Over the weekend we finally completed out DIY headboard for our Master Bedroom. This was a quick project, but it took awhile to get around to. We plan to complete a number a projects in the next few months before the our new little one arrives.
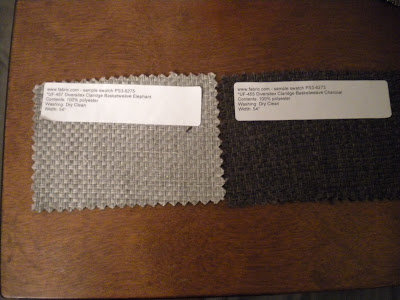
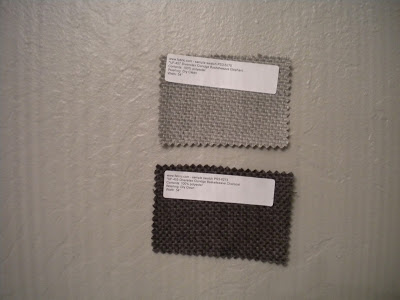
But back to our headboard project. After much consideration and debate between a light grey fabric vs. a dark grey fabric. We went with a dark grey linen fabric{ so glad we did } Our inspiration for our was the Nail head Upholstered Headboard from West Elm. Here's a glance of our headboard.
Supplies:
Particle Board Cut to 63 wide x 43 high { just a smidge larger then a Queen bed width }
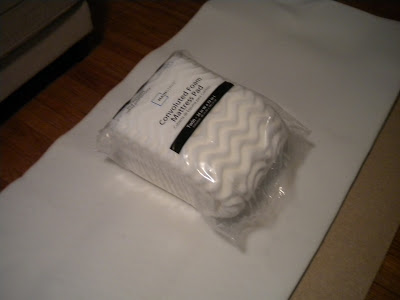
2 Twin Mattress Foam Pads
2 Yards of batting
2 Yards of Muslin
2 Yards of Dark Grey Fabric
Staple Gun and Staples
Here's what we did. Instead of buying expense foam, we bougth two twin mattress pads from Wal-Mart and placed the flat part of the pad on top of the board. Then place the other pad contoured side down, which created a nice thick pad. Note: The pad wasn't wide enough to cover the entire length, which is fine because the portion is the very bottom of the headboard which will be cover by the box spring
Next we placed the batting over the pads and then wrapped the foam around the board and stapled the batting and muslin in place.

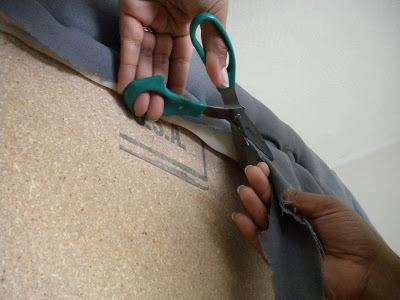
Then we stapled the grey fabric on the board. First we stapled the top then bottom and then sides. We pulled the material very very tight. Then I carefully trimmed the excess fabric from the back of the board.
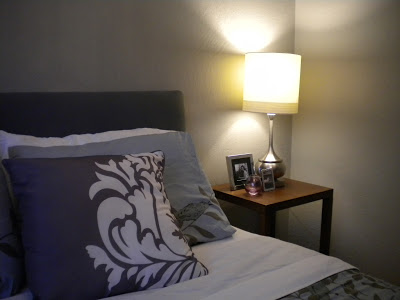
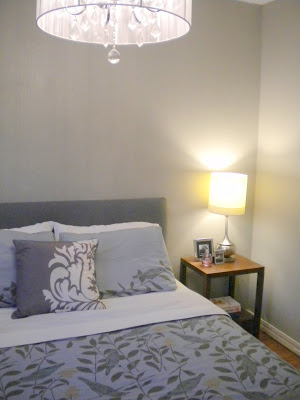
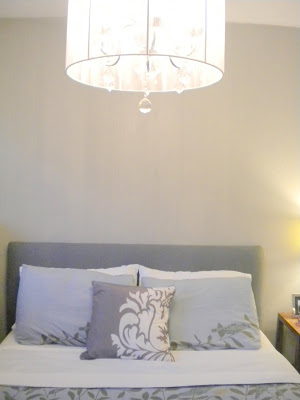
We really like how the headboard turned out, it looks great in our bedroom. I also love how soft the headboard is, its nice to sit up in bed and have a nice thick cushion to lean on. We decided to skip nail heads on our headboard and prefer how it looks without. We are also playing with the height of the headboard and most likely will raise it a few inches. Before the headboard after, a reminder of how bedroom looked pre-headboard.
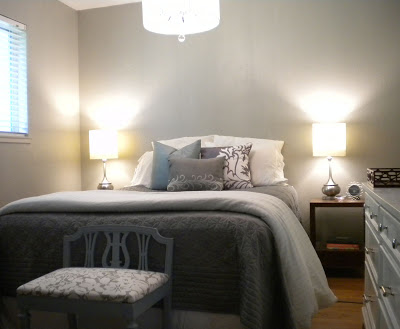
Here's our diy headboard in our bedroom.
There are a few projects left to complete in our bedroom: sew Euro Pillow Covers, hang curtains and install new blinds and eventually hang artwork. I'm excited that our bedroom is closer to being completed.
What project are you looking forward to completing?

But back to our headboard project. After much consideration and debate between a light grey fabric vs. a dark grey fabric. We went with a dark grey linen fabric{ so glad we did } Our inspiration for our was the Nail head Upholstered Headboard from West Elm. Here's a glance of our headboard.
Supplies:
Particle Board Cut to 63 wide x 43 high { just a smidge larger then a Queen bed width }
2 Twin Mattress Foam Pads
2 Yards of batting
2 Yards of Muslin
2 Yards of Dark Grey Fabric
Staple Gun and Staples
Here's what we did. Instead of buying expense foam, we bougth two twin mattress pads from Wal-Mart and placed the flat part of the pad on top of the board. Then place the other pad contoured side down, which created a nice thick pad. Note: The pad wasn't wide enough to cover the entire length, which is fine because the portion is the very bottom of the headboard which will be cover by the box spring
Next we placed the batting over the pads and then wrapped the foam around the board and stapled the batting and muslin in place.
Then we stapled the grey fabric on the board. First we stapled the top then bottom and then sides. We pulled the material very very tight. Then I carefully trimmed the excess fabric from the back of the board.
We really like how the headboard turned out, it looks great in our bedroom. I also love how soft the headboard is, its nice to sit up in bed and have a nice thick cushion to lean on. We decided to skip nail heads on our headboard and prefer how it looks without. We are also playing with the height of the headboard and most likely will raise it a few inches. Before the headboard after, a reminder of how bedroom looked pre-headboard.
Here's our diy headboard in our bedroom.
What project are you looking forward to completing?