

We’re entering the home stretch of our DIY Bookcases we’re building in our living room, as a reminder the bookcases are replacing our old set up: campaign dresser + two free-standing bookshelves. Read more about the project in Part I. It’s so exciting to be near the completion of our project! Over the weekend we finished adding the trim to the bookcases, installed the Crown Molding and painted! The fun part of this project is starting, selecting cabinet hardware.
Installing Crown Molding
Honestly, DIY Projects aren’t always fun; things can go from smooth tough, real quick !! This is precisely the case for us when tackling Crown Molding. The toughest part of this project for us had been addressing the Crown Molding. We can quickly make the outside cuts, but for some reason, the inside cuts were super hard and not aligning correctly, we even made little templates, and yet nothing clicked. Plus you cut crown molding upside down and opposite to what you think makes sense. Why can’t it be as easy as installing baseboards!
We were so ready to throw in the towel and just place crown molding between the two bookshelves and then add some trim above the bookshelves front to tie everything together. After making a quick trip to Lowes to look at trim options for our bookshelves, we came across pre-cut crown molding corners inside and outside; all you have to do is tuck your existing crown molding inside and bam you're down. This ended is the perfect solution for our crown molding dilemma, and it adds a little extra oomph to the corners. Over the weekend I begun the process of caulking the seams and everything looks so good! Hasani was able to join the old crown and new crown seamlessly on one wall, yay inside corners Next week we’ll tackle the other side that involves taking down a large section of crown molding, making the perfect inside corner cut and then re-attaching.
Painting the Bookcases
To paint the bookcases, I’m using Glidden Paint in Satin color match to the cabinet doors. I choose paint and primer in one to cut down on the painting, I was in ahh of the first coat. The bookcases are looking so good! To paint the bookshelves, I’m using a small sponge roller and a nice all-purpose paintbrush to make sure there are no drips and even a nice even finish. An option is to pre-paint your cabinets before installing to help save some time since we’re mostly tackling this project on our weekends we opted to build and then get everything painted. I have at least two more coats of paint to apply and lots of sanding to tackle. Once my final coat of paint has been applied, I plan to let everything fully cure for at least seven days.


Selecting Hardware
Sunday afternoon I started to start adding the doors back on the cabinets, one by one I was in ahh. It looks incredible in my living room; I’m blown away with all the additional hidden storage we now have. Now that we’re nearing the finish line I’ve been looking at hardware options and trying to figure out if I want to go with pulls or knobs. Add the perfect hardware to cabinets is like adding jewerly, it just sets to whole look off.
I’m a totally a gold convert and loved the aged brass campaign pulls we have our dresser that used to be in our living room, I’ve decided to stick with gold. These are my favorite gold hardware inspiration for the cabinet doors.

image via Little Green Notebook

image via The Glitter Guide
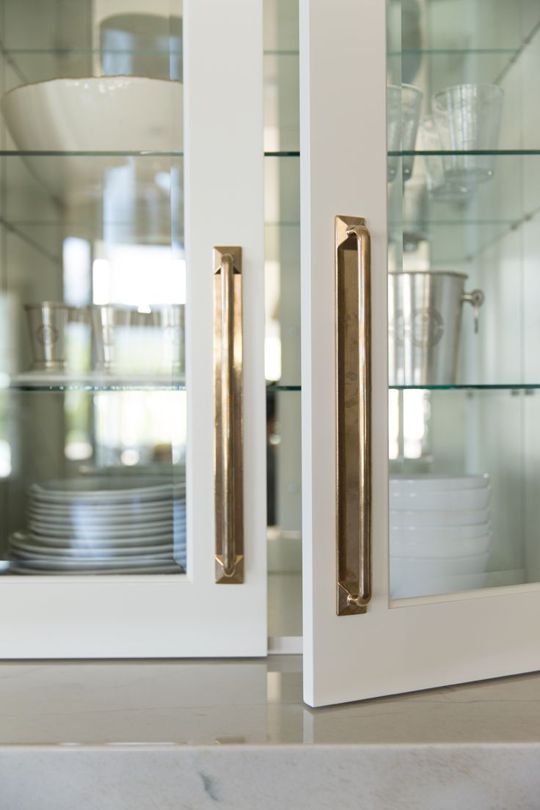

image via Interiors by Studio M and Apartment Therapy
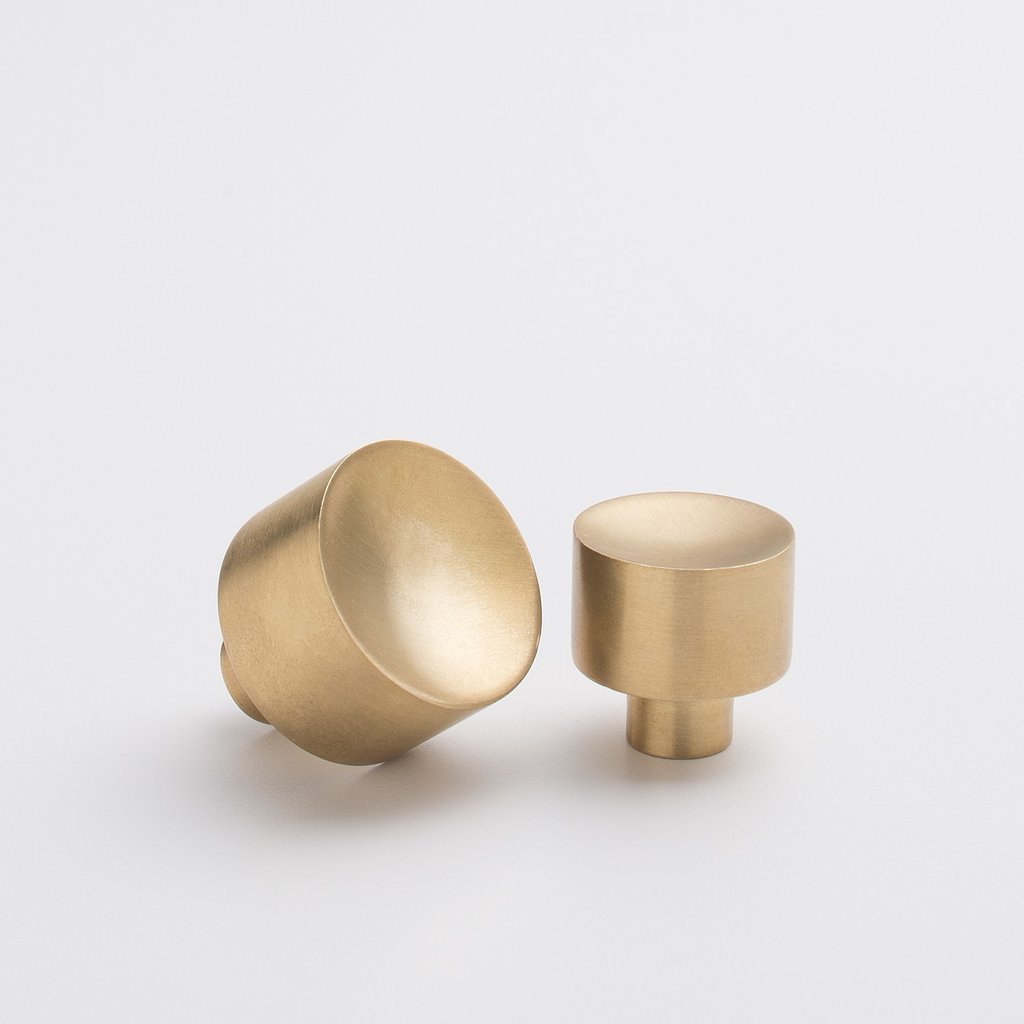
I’ve spent countless hours looking for the perfect gold hardware, below are my top four pics, most likely I'll go with knobs for a seamless look. I'm most drawn to matte gold knobs that have a unique design.
Hardware Options

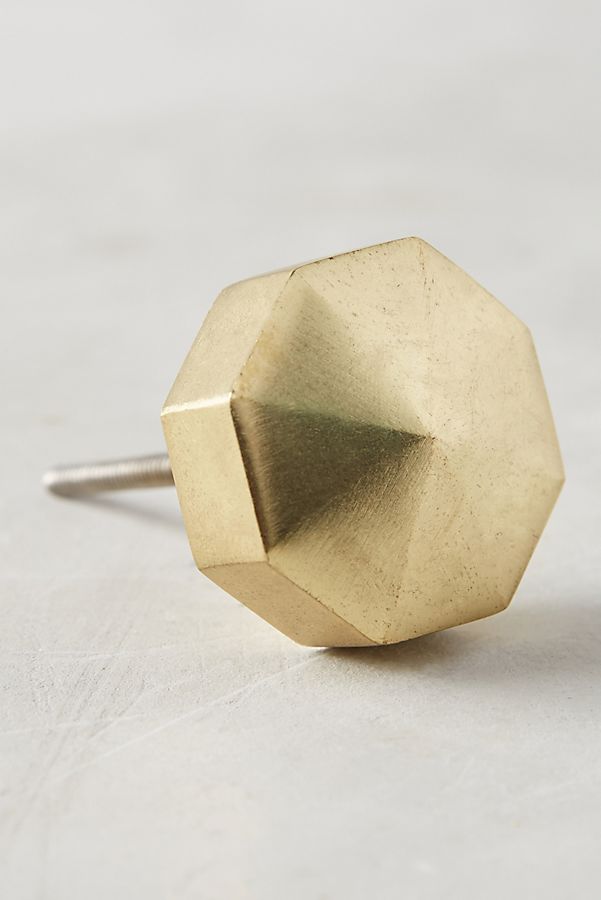
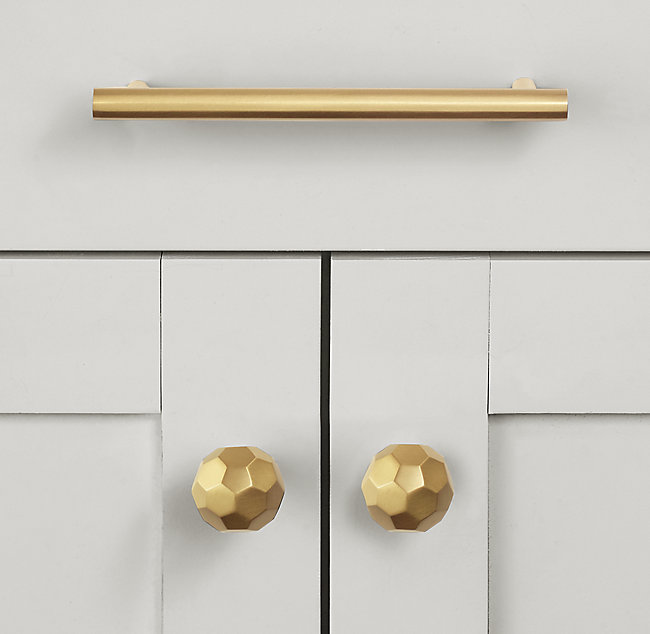
I'm currently leaning towards the matte hex knobs, they just look so pretty and I love the shape and think it would bring a nice element on the cabinets. Which knob hardware do you love the most? I recently shared this sneak peek of built-in bookcases on Instagram, isn't this project coming together so nicely.

Yes, its been a ton of work with unexpected headaches (hello Crown Molding) but we've learned so much along the way + its incredible to create a vision you have for your home together! I'm so thankful Hasani shares my passion (with gentle pushing) to tackle projects around our home. What do you think of our project so far?


