Blissliving Home Giveaway

I've been wanting to change up my my bedroom and give it a refresh. One of the easiest ways to kickoff refreshing your own bedroom is by changing the bedding. Blissliving Home recently reached out to me, wanting to help my start my bedroom refresh. Blissliving Home was created by Mei Xu [ read more about Mei on her blog ] the bedding collections offered from Blissliving Home are all inspired by her travels, passion for art and design. Blissliving Home is a 'Global Touch for a Modern Home.' 


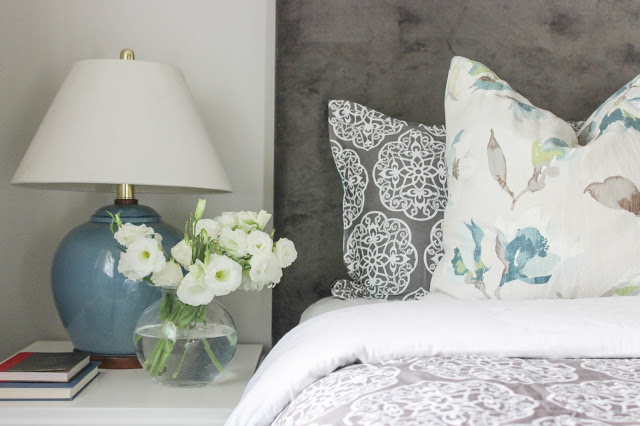
Blissliving Home sent me the Shangra La Duvet along with two Temi Throws for my bedroom. In my room, I mixed the Shangra La Duvet with my existing Euro Pillows. I love how well the colors and patterns mix together. Pattern mixing tip, pair larger floral prints with geometric deigns for a flattering look in your bedroom. By using my existing Euro pillow covers, I made I was able to layer in more colors and tie my lamps into my bedding.  


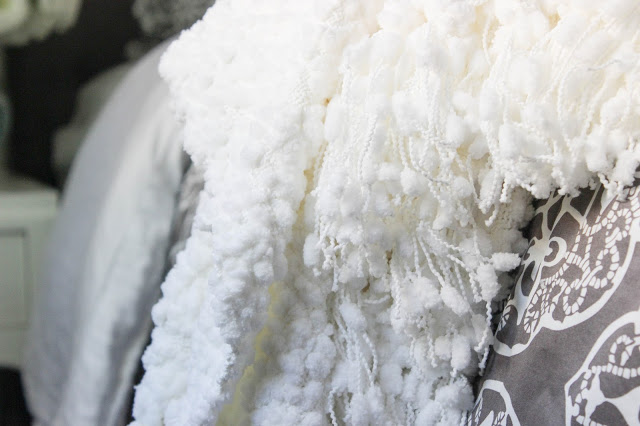
Here's a close up, of my new favorite throw, the Temi Throw. I'm a huge throw person and love all the texture and warmth the Temi throw adds to my bedroom, I'm pretty much obsessed with this throw. 


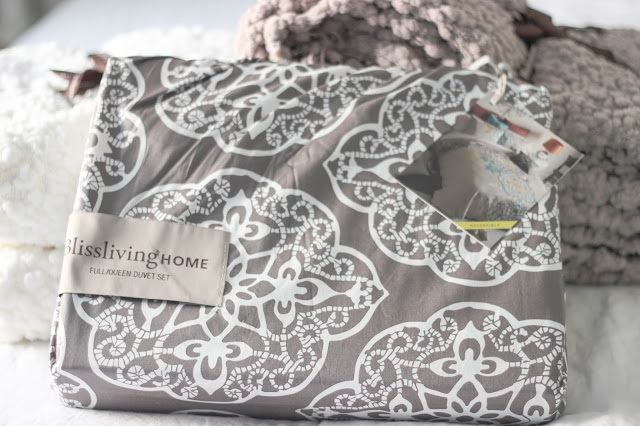
I'm thrilled that Blissliving Home and Chic Little House has partnered in offering my readers a giveaway! Giveaway details below! Below is the Shangra La Duvet that is on my bed. 


Giveaway Details:

Shangra La Duvet Set: Set includes Duvet and Two Pillow Shames Size Full/Queen or King
One Temi Throw Colorway Choices: Thistle, Dove Grey or Snow White 

Giveaway Starts 6/24/2015 and Ends 7/2/15 and Midnight PST - Open to all US and Canadian Residents. 

Good Luck Friends! 

a Rafflecopter giveaway


DIY BBQ Grill Cart

A few weeks ago, I shared my latest

DIY Workshop Project

with The Home Depot is building a BBQ Grill Cart just in time for Fathers Day. Join me this Saturday June 20, 2015 at The Home Depot Denver Store # 1532, in Denver, Colorado from 10:00 am - 11:30am. I'm sharing how to build your own Grill Cart. Today, I'm sharing my customized BBQ Grill cart, that my husband and I built for our patio. I'm so in love with how our BBQ Grill Cart turned out.  

Using the initial design plan, I re-worked the BBQ Cart to  for our needs. We built the BBQ Cart using a Kreg Jig to build the frame, the Kreg Jig creates pocket holes which allow for all screws to be hidden and creates extra strong joints. For our cart, we attached two wheels in the front and cut the back legs at a 15 degree angle to enhance the design or the cart. The bottom half of the grill cart was built using framing studs, 1x2, 1x3 and 1x4 boards. 

To attach the bottom slats on the cart, I used our Ryobi nail gun, and placed an extra piece of scrap wood between each slat to use as a space. Using the scrap wood as a spacer, cuts down on the measuring time. 

After the the top and bottom slats on the cart were attached, I filled the nail holes with wood filler then sanded the entire frame using a Ryobi orbital sander to create a nice smooth surface. 

The

 lower potion of the BBQ Cart is painted Intellectual 

Grey, by Behr Paint, using exterior satin paint. 

We wanted to using a dark grey,that would compliment the exterior colors of our house. I think we found the perfect color, its such a pretty deep rich grey. On the side of the grill cart, we attached an extra long drawer pull to hold towels, and tools. 

For the top of the BBQ Grill Cart, we decided to use Cherry Wood, which is such a pretty piece of wood and looks even better when stained. Top top was stained with one coat of Jacobean using a lint free cloth. A wood spice rack is the perfect addition on top of the cart to help hold BBQ Sauces, Spices and fresh herbs. 

I layered a wood cutting board on top of the BBQ Cart, for cutting and assembling food, having a removable working surface allows for easier clean-ups.

The bottom shelf of the BBQ cart is perfect for holding misc cooking gear along with candles, utensils and drinks. I'm a huge fan of using trays indoors and out to help corral items. On our cart, the clear tray is used to hold drinks, skewers, lemon squeezer and thermometer. 

Our BBQ Grill cart, we built is bar far one of my favorite DIY building projects to date, I love how our cart turned out and how versatile it is doubling as extra cooking space and a full bar cart when needed. We bought a small grill cart cover to use to cover it with when not in use, which already came in handy we received lots of Summer rain last week.  

Quick Reminder:

The Home Depot DIY Workshops are typically held on Saturdays and Sundays throughout the month are all about skill-building, from teaching how to tile, outdoor projects and fun seasonal projects, associates are on hand to answer questions you may have. Please Click 

Here

to Register for the FREE DIY Workshop: Grill Cart 

Join Me! Saturday June, 2015 at 10:00 am - 11:30 

The Home Depot Denver Store # 1532

3870 Denver, Colorado  80207

Not local to the Denver Colorado area? Please click 

here

 and register for a DIY Workshop near you! Also follow along on my 

Instagram

 /

Twitter 

and 

Facebook

 on  June 20, 2015 and use the following hashtag #DIYWorkshop to share and see what I'm up to.  

Looking forward to seeing you this Saturday!! 

Sponsored Post: 

I acknowledge that The Home Depot is partnering with me to participate in this Workshops Program. As a part of the Program, I am receiving compensation in the form of products and services, for the purpose of promoting 

The

Home Depot

. All expressed opinions and experiences are my own words. This post complies with the Word Of Mouth Marketing Association (WOMMA) Ethics Code and applicable Federal Trade Commission guidelines.