
There's something about actually putting a crib in room it's intended for that made me giddy with excitement. But lets back up a bit and talk about our very quick crib hunt. When we found out we where pregnant, I pretty much already knew I wanted a Jenny Lind Crib. Our oldest son also had a Jenny Lind crib, I loved it then and I love the crib now. I knew wanted, just had to convince Mr. CLH the crib in white wouldn't look to girly, lucky for me he agreed. I was all set to buy the crib online via Amazon.com less hassle.

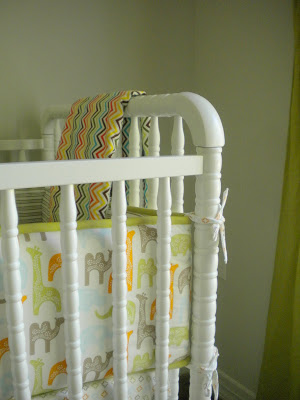
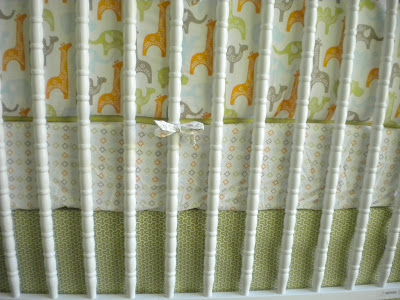
After we out we were expecting a little baby boy, my hunt begun for bedding and would work well with the Artichoke Pear Curtains, I fell in love with here. At first I was leaning towards buying a bedding set on Esty, but when you want a certain color it can be so HARD to find what you want. One day whiling strolling thought Target's baby section, I saw Dwell studio's new baby line. I was overjoyed when I say the exact color Artichoke Pear that I've been looking for. I also liked the cute modern animals (giraffe, hippo, and camel ) pattern. Of course I bought the bedding and coordinating sheet.
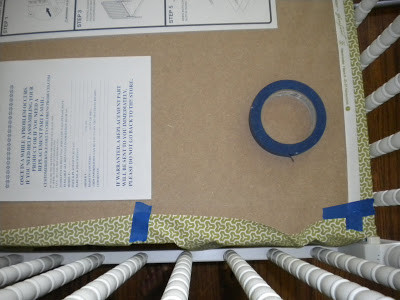
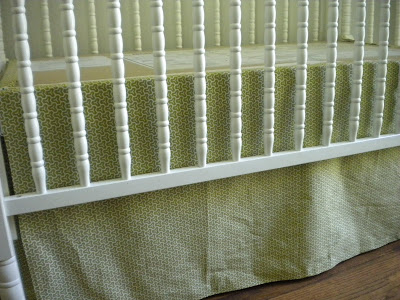
I wanted to bring in a bit more color in and pattern into the bedding with a fun print. I don't know if its just where we live in Northern California, but finding cute fabric can be a chore. So I looked online and came across this darling print for the crib skit. Like several ladies in blogland, I decide to sew my own cribskirt pants (my husband prefers saying pants since its for a little boy!), but skipped the sewing part and used iron on hem tape. It made the task of DIY a Crib skirt pants even faster. I attached the crib skirt to the bed using Velcro. As he gets older and we move the crib down, the skirt pants will be able to keep adjusting.
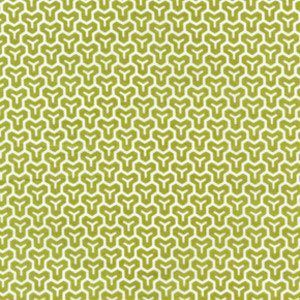
Here's the pretty fabric I used, I bought 2 yards and end up using most of it, the rest will be truned into some cute for his nuseryt. In person the fabric is less sprout green and more artichoke pear.
Making the cribskirt pants, after each side was hemmed I used trusty blue painters tape to hold in pace to check the length.

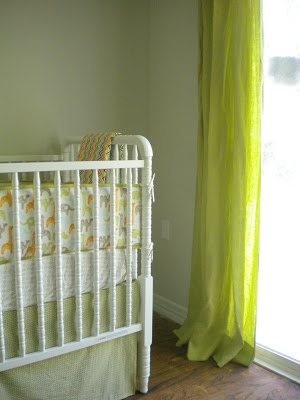
Last week after sharing the curtains for our baby's nusery I promised better pictures, of course I missed great sunlight momments, boo! But here's how our son's nursery looks right now. I love how all the patterns work so well together, and the chevron baby blanket, made looks cute laying on the crib.
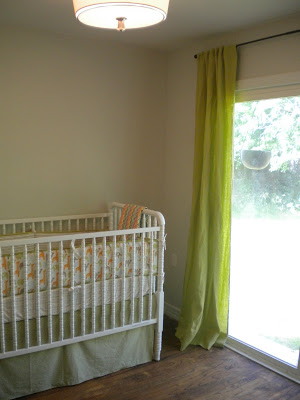
The room is fianlly coming together, and our little one is set to arrive within the next 7 weeks. I'm hoping to have the nursery finished in the next 3 - 4 weeks, pray for me! lol
What do you think so far?
Follow Along: As we create a nursery for our baby boy due in June 2011. From the beginning; Nursery Bare Bones, Paint Makes the Difference, Bye Bye Boob Light & Hemming & Hawing

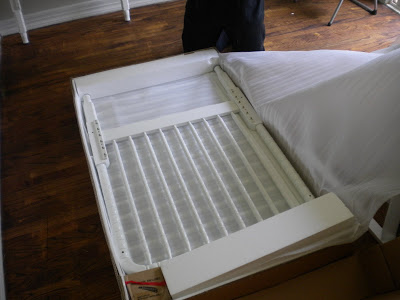
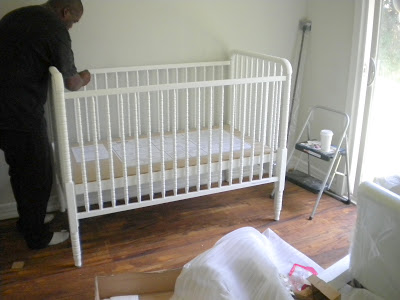
One day way back in January, while out Shopping with my husband and I our son I stopped in Sears to check out baby items. I stopped dead on my tracks when I saw the exact white Jenny Lind crib in white and on clearance! For 1/2 the price the Amazon one was, so our crib only cost us $ 99.99!! Remember how I said, buying online would be less hassle, well only two of us could ride home in the car, since the crib took up our backseat. So I stayed behind while my husband and son took our crib home, while waiting on them I hit up the food court. Here's Mr. CLH putting the crib together last weekend.
After we out we were expecting a little baby boy, my hunt begun for bedding and would work well with the Artichoke Pear Curtains, I fell in love with here. At first I was leaning towards buying a bedding set on Esty, but when you want a certain color it can be so HARD to find what you want. One day whiling strolling thought Target's baby section, I saw Dwell studio's new baby line. I was overjoyed when I say the exact color Artichoke Pear that I've been looking for. I also liked the cute modern animals (giraffe, hippo, and camel ) pattern. Of course I bought the bedding and coordinating sheet.
I wanted to bring in a bit more color in and pattern into the bedding with a fun print. I don't know if its just where we live in Northern California, but finding cute fabric can be a chore. So I looked online and came across this darling print for the crib skit. Like several ladies in blogland, I decide to sew my own crib
Here's the pretty fabric I used, I bought 2 yards and end up using most of it, the rest will be truned into some cute for his nuseryt. In person the fabric is less sprout green and more artichoke pear.
Making the crib
Even before placing the remaing beding on the crib, was already smitten with how the geometric pattern look against the classic lines of the Jenny Lind Crib. Again my iron pretty much sucks and wouldnt actaully iron the cirb skirt pants. Oh well.
I'm going to plant some pretty flowers in black hanging pots outside the sliding glass door and also a cute bird feeder to attrach birds in the summer.
The room is fianlly coming together, and our little one is set to arrive within the next 7 weeks. I'm hoping to have the nursery finished in the next 3 - 4 weeks, pray for me! lol
What do you think so far?
Follow Along: As we create a nursery for our baby boy due in June 2011. From the beginning; Nursery Bare Bones, Paint Makes the Difference, Bye Bye Boob Light & Hemming & Hawing


