
A couple of weeks back we added the Ikea Expedit bookcase to our living room to create more storage for DVDs and books and hey it adds interest in our living room. Before I start filling the bookcase with books, I had to find some inspiration & styling tips.
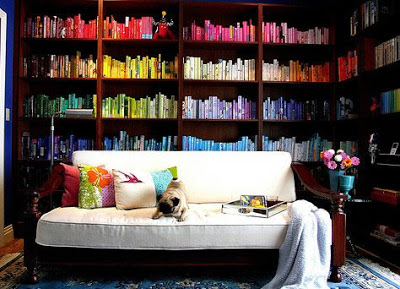
I love the bookcases below, the dark wood of the bookcases sets off the color of the bookcase spines in such a pretty way.
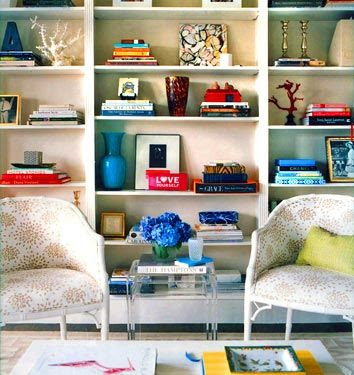
I also love this white bookcase, the owner filled the bookcase with books, pictures, candle holders and more. It create the perfect visaul interest behind the two charis.
Style Like a Pro:
Here are some bookcase styling tips from one of my favorite shelter magazines, Style at Home & Martha Stewart Living
1. Group books with the same color same color spine on a shelf
2. Stack books horizontally and vertically, its practical and creates a more dynamic display
3. Paint the back of your bookcase a vibrant color, or just line them with colorful paper to make the bookcase pop.
4. Don't be afraid to mix and match hardcover and softcover books
5. Layer in frames, vases and objects of varying textures to add visual interest on the shelf's with your books and ditch the boring bookends
6. Don't cram your books in, open space on bookcase help balance the overlook.
7. Books end to end look best on the bottom shelf
8. Group books together by theme
Here are a few Chic Little House tips, I've picked up along the way. Save money by shopping thrift stores for interesting reads on the cheap { read more about it here } remove the book covers and show off the colorful spines. Most importantly fill the shelves with books to love to read, I think a bookcase should be a personal relfection of your personalty.
Do you have any tips for styling a bookshelves?

I love the bookcases below, the dark wood of the bookcases sets off the color of the bookcase spines in such a pretty way.
I also love this white bookcase, the owner filled the bookcase with books, pictures, candle holders and more. It create the perfect visaul interest behind the two charis.
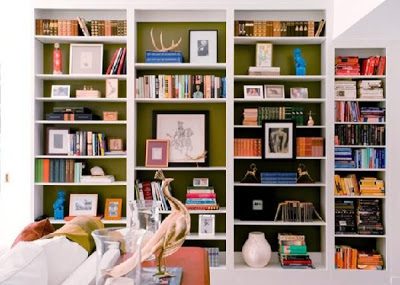
The standout feature for me for the bookcase is the greenback ground it makes all the books & items really pop.
Style Like a Pro:
Here are some bookcase styling tips from one of my favorite shelter magazines, Style at Home & Martha Stewart Living
1. Group books with the same color same color spine on a shelf
2. Stack books horizontally and vertically, its practical and creates a more dynamic display
3. Paint the back of your bookcase a vibrant color, or just line them with colorful paper to make the bookcase pop.
4. Don't be afraid to mix and match hardcover and softcover books
5. Layer in frames, vases and objects of varying textures to add visual interest on the shelf's with your books and ditch the boring bookends
6. Don't cram your books in, open space on bookcase help balance the overlook.
7. Books end to end look best on the bottom shelf
8. Group books together by theme
Here are a few Chic Little House tips, I've picked up along the way. Save money by shopping thrift stores for interesting reads on the cheap { read more about it here } remove the book covers and show off the colorful spines. Most importantly fill the shelves with books to love to read, I think a bookcase should be a personal relfection of your personalty.
Do you have any tips for styling a bookshelves?


