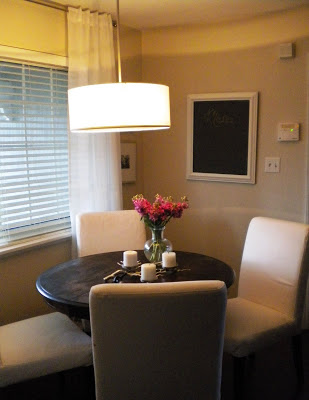
When I first started planning our dining room re-do I knew I really really wanted an amazing drum shade pendant light with a diffuser that I often see in restaurants where I live. I love that drum shades give off such a cool vibe and add a wonderful focal point to a room. Originally when I started looking for lighting I came across many drum shades that were way out of our budget. I also came across this one from Overstock.com for $ 89.99 but it didn't wow me. Then when I created my mood board one my objectives, was to find a drum light fixture for our dining room at a good price. Then lovely Micah over at The Yellow Front Door suggested I look into the Pendant Drum Shade from CB2, it’s the same shade she has in her dining room.

Eden Pendant


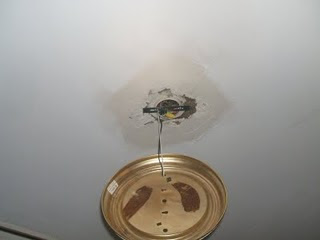
I instantly fell in LOVE with the Eden Pendant Lamp! It’s amazing, very pretty, nice linen fabric, oh and it’s very large. I knew it would be the perfect complement to our dining room. There was only one small dilemma for us; it was a plug in cord. Since are dining room already had hardwired lighting, Mr. CLH and I decided to hard wire the Eden Pendant Lamp. We made a trip to Lowes and decided to use a Brush Nickel Mini Pendant kit. While there we also picked up a small ceiling medallion to help cover our icky whole in the ceiling and add a layered elegant look to the light fixture. My husband installed the new light fixture himself and I don't have any pictures he did it while I was at work!
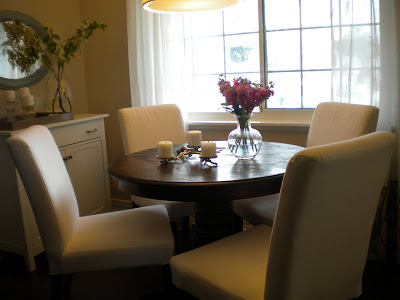
The kit comes with three downrods, with used two downrods. Basically he installed the Pendant Kit then attached the drum shade onto the light fixture and voila! We have light. I think the Eden Pendant light really brings the whole dining room together and adds so much ambiance to our new dining room! For more pictures of our dining room makeover click here.
Budget Breakdown
Eden Pendant Lamp $ 49.95
Ceiling Madallion $ 6.99
Brsuh Nickel Mini Pendant Kit $ 17.99 (online it's more?)
Total: $ 74.93 - Still cheaper than the Overstock Price and for a extra bucks we were able to customize the look for our dining room. Can't beat that. Have you fallen hard for drum shades, like I have? Or have you customized a light fixture to better suit your needs?