
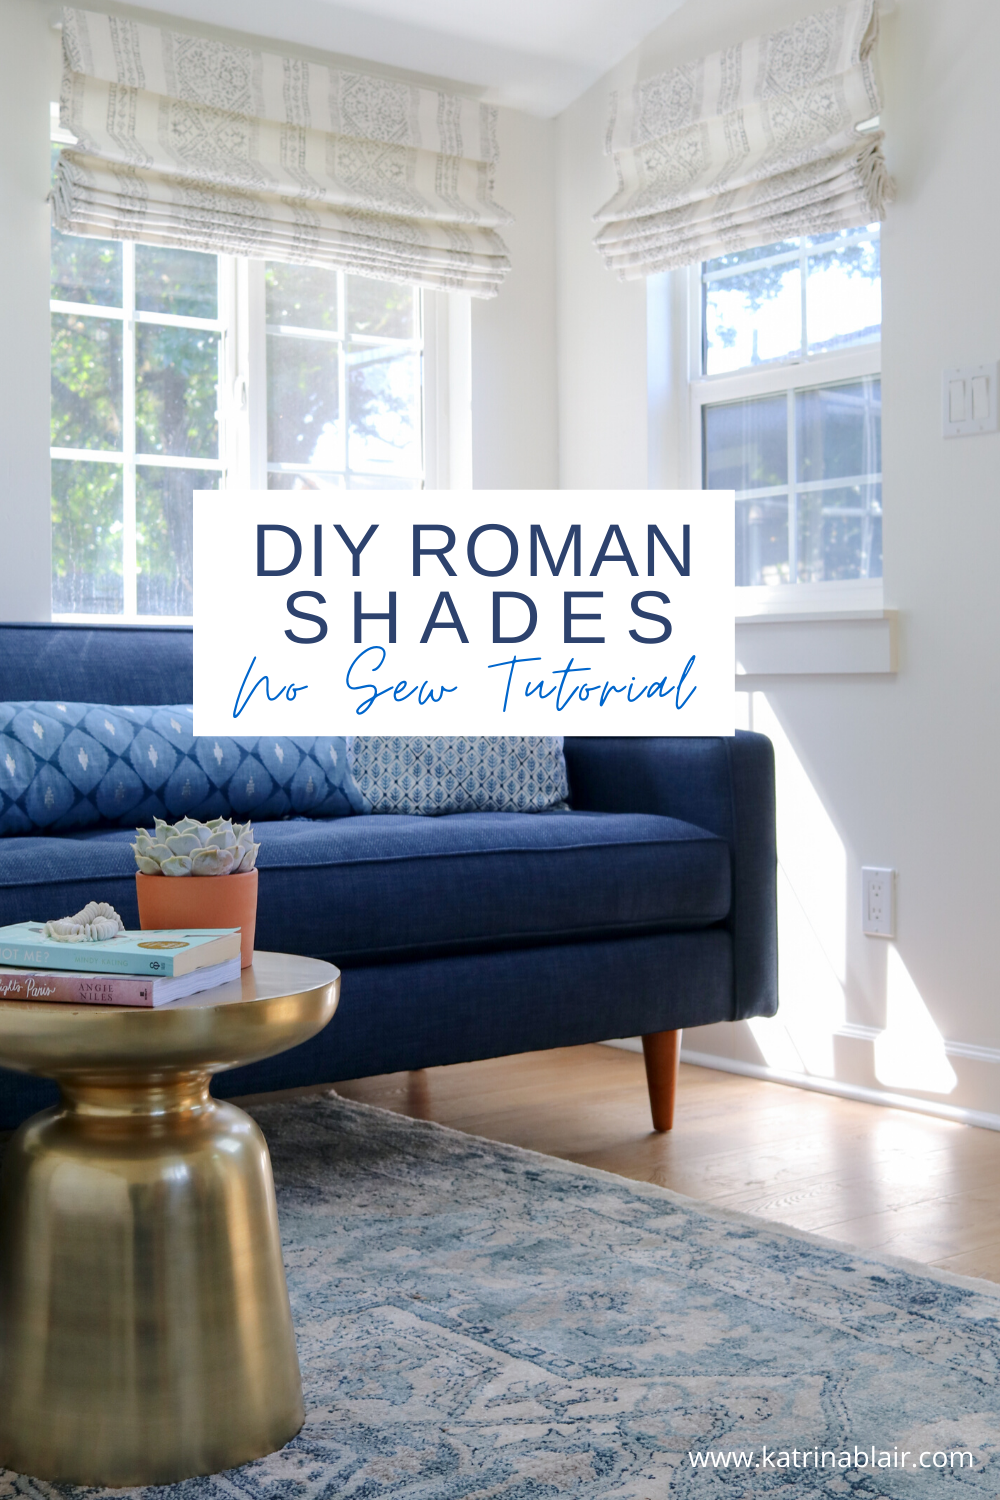
One of my favorite projects for my One Room Challenge was my DIY Roman Shades. The Roman shades turned out incredible and I love how much interest they add in my backyard cottage. Custom Fabric Roman shades can be very expensive and since I’ve made roman shades in the past for my son’s bedroom and my kitchen, I knew this was a project I wanted to tackle again. I’ve gotten so many requests on how to make Roman Shades. Seriously I think this is one of my most requested DIY projects, like ever!! I’m so excited to share this DIY project that requires no sewing. just attention to detail. The process can feel very tedious, but it's so worth it! When it comes to selecting fabric for Roman Shades, I love how you can do muted or bold with a pattern, its the next layer to dressing your window.
I just love how the Roman Shades look on the corner windows in the Cottage Studio, so beautiful! They just add the perfect polish to the windows.


Roman is a timeless classic, look great in so many spaces: kitchens, bathrooms, living rooms, the list goes on and on. For this project, I recommend using drapery weight fabric, too thin fabric and then Roman Shade can look cheap.
Quick Tip on Measuring Window for an Inside Mount - Measure your window in three sections: top, middle, and bottom - use the smallest measurement of the three! When measuring for an outside mount, typically add 2-3 inches to the width of the window on each side! The larger windows in the cottage, where hard to find in-stock sizes, so I ended up only being able to add one each on either side but made it work!
FUN FACT: I used to sell custom window treatments & readymade window treatments when I was younger at a Department store…..so I know a lot about windows, draperies, etc.
The trick to making this DIY Roman Shades is using a basic ready-made cordless roman shades; the basic roman shade becomes your lining for the Roman Shade. Using the fabric of your choice, you’re going to cover the existing roman shade. For my cottage studio, I used the Arlo Cordless Light Filtering Roman Shades. The existing fabric on the roman shade is polyester, perfect to make into a lining. I was surprised by the quality of the shades, they lift and close with ease. For the small windows and low ceilings in the cottage studio, I opted to hang the shades outside the windows. The Arlo Roman Shades are the Plain Classic Pleated Shades, which made them easy to work work.

Cordless Roman Shades
These roman shades are a great weight and perfect for this project
This project is easiest to do with the help of a friend! I’m so thankful my girlfriend came over to help me. Without her help, this project would not be possible!
Roman Shade Supplies
Iron
Ruler or Fabric Ruler Tape
Pining Needles
How Much Fabric You Need
Most Ready-Made Roman Shades come in in two lengths, 60 inches or 72 inches long. The shades I ordered were 60 inches long. For each Roman Shade, I used 70 inches of fabric, which is almost two yards of fabric. The additional ten inches is for the valance and all the seam allowances on the top and bottom of the shades.
* If you buy the Arlo Roman Shades, please note the shade is attached on the header of the shade with velcro, and the valance is also attached to the shade, it’s an easy workaround.
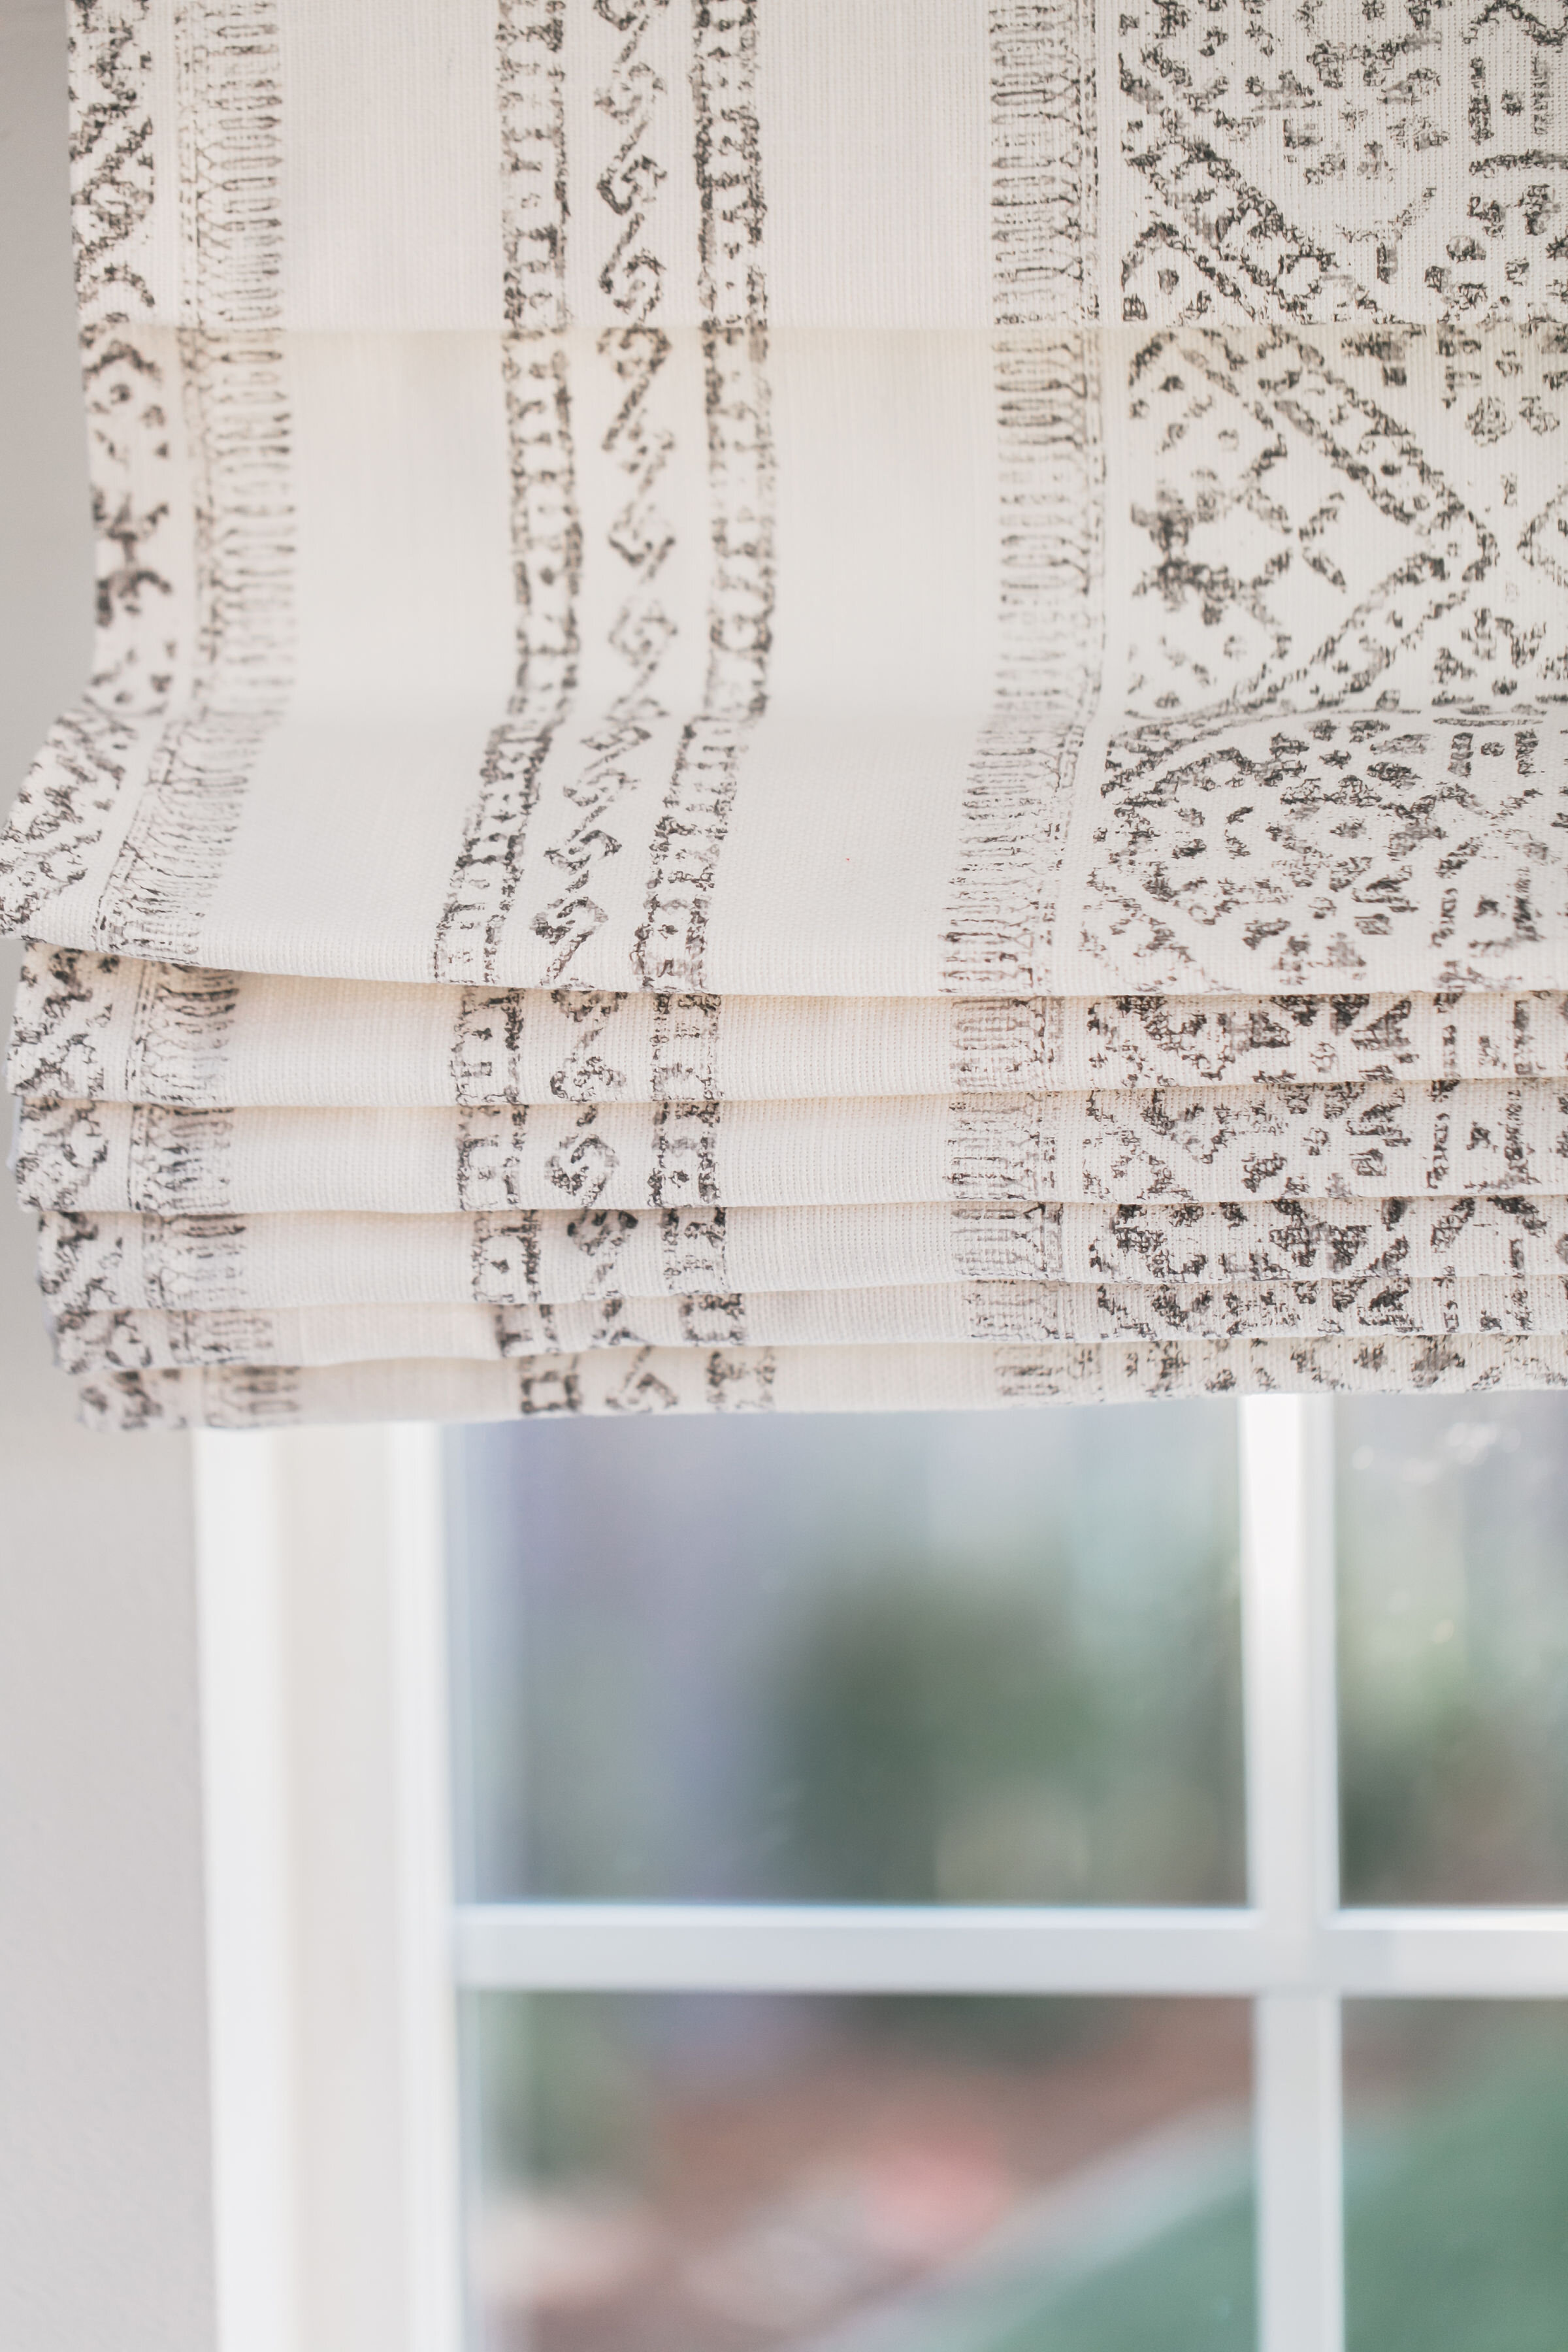
Because I was using patterned fabric and making four Roman Shades and wanted them identical, I had to make sure I started with the exact same pattern on each shade and made sure the pattern on all the valances matched perfectly and tied into the Roman Shade to look continuous.
* Using drapery weight fabric is key to making the Roman Shades turn out beautifully since the existing roman shade turns into a liner.
Step by Step Process

When using a patterned fabric: geometric, floral, stripes to recover the existing roman blind, think about the placement of the pattern on the shade. For floral patterns think about how each fold will fall visually. Geometric and stripe fabrics, you want to make sure the fabric is lined up perfectly on the header of the Roman Shade so the fabric stays straight.
Before beginning, make sure you iron your fabric to make sure it’s nice and smooth
For the width of the fabric, add at least two inches of fabric and then cut. If you Roman Shade is 24 inches wide, add two inches = 26. One inch each on either side will be for the seam allowance, fold over the fabric one inch, iron the seam and then iron the hem tape inside the seam
Open the Roman Shade all the way, since the shade is cordless and using tension to open and close, I put books on top of the shade to keep the shade open! Sounds crazy but it worked.

ONE // Now that your pattern is lined up [and ironed] on the Roman shade at the top of the fabric, fold over one inch. This will be your seam allowance on the top. Iron the one-inch seam and iron the gem tape inside the seam. * Make sure all hems are straight!
Now pin the fabric to the top of the Roman Shade, this is how the fabric will look on your roman shade. Also confirm the width over your fabric is an exact match you the existing Roman Shade.
TWO // Flip of the Roman Shade Valance and in small sections place a bead of glue on the very top of the Roman Shade header and attach your fabric to the shade
Below we are gluing the fabric to the header of the roman shade, working in small sections
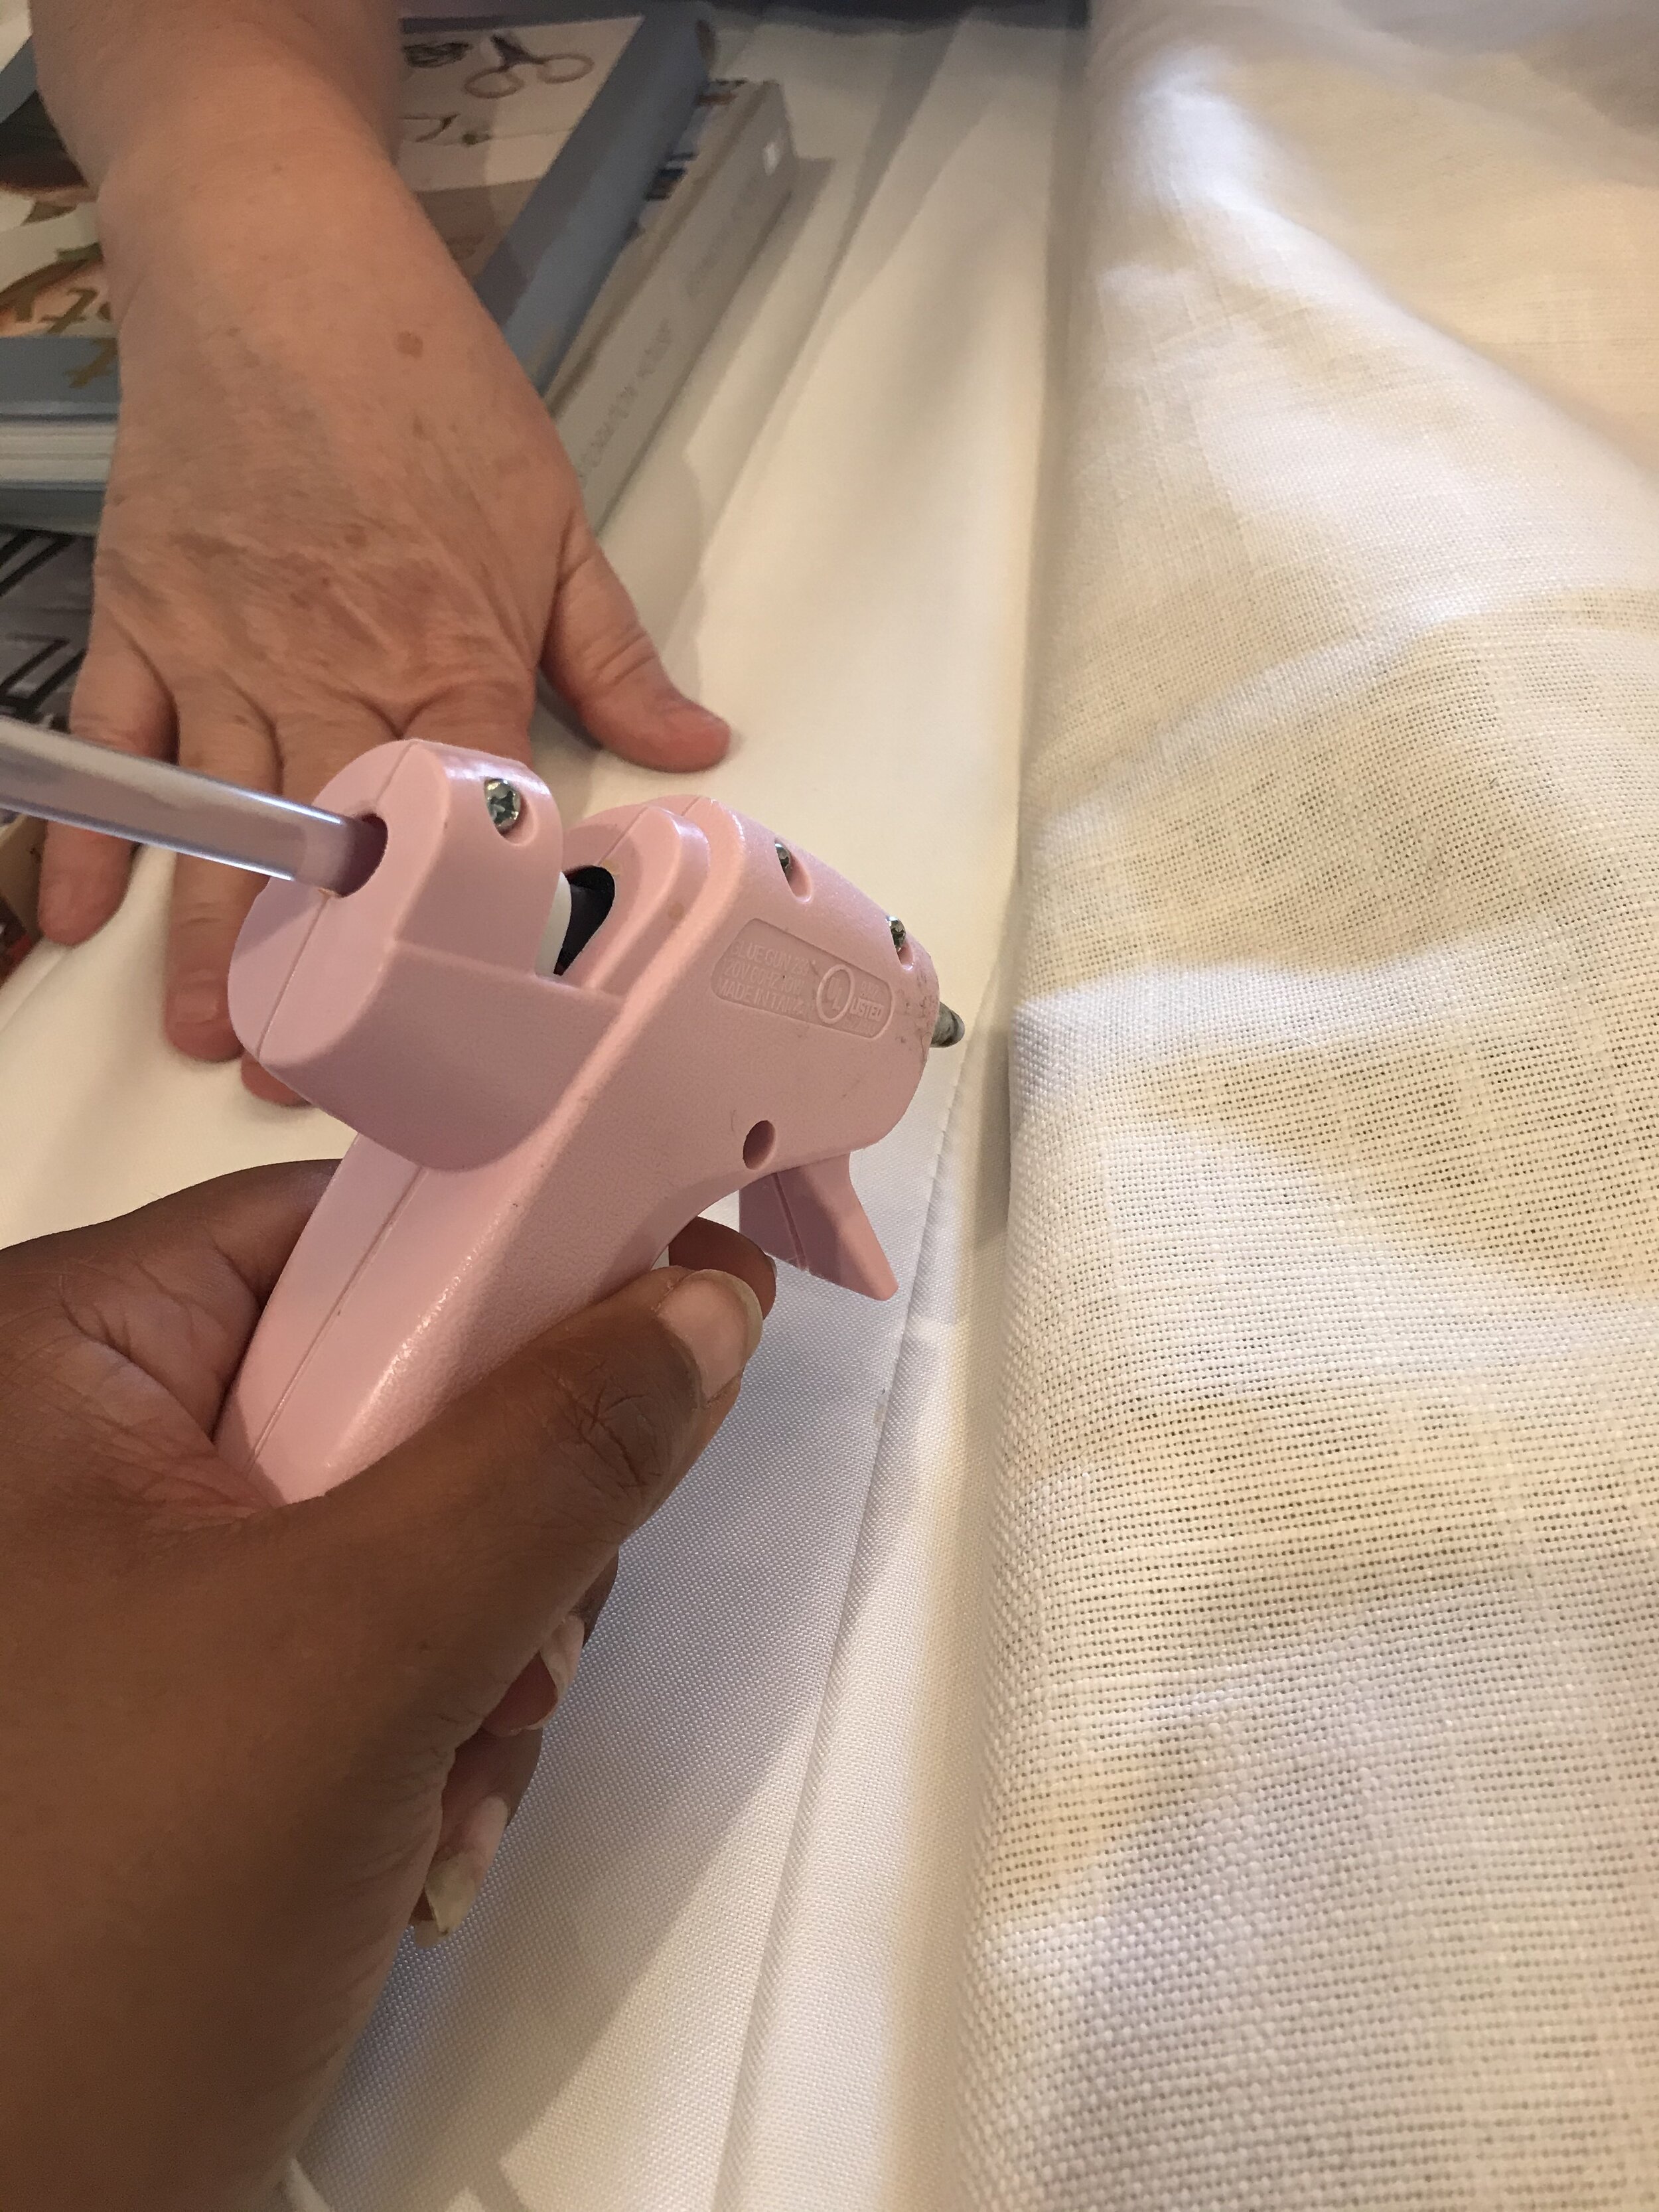
Here’s a closeup of how the top of your Roman Shade should look as you apply the glue and press down. Again work in small sections as you glue.

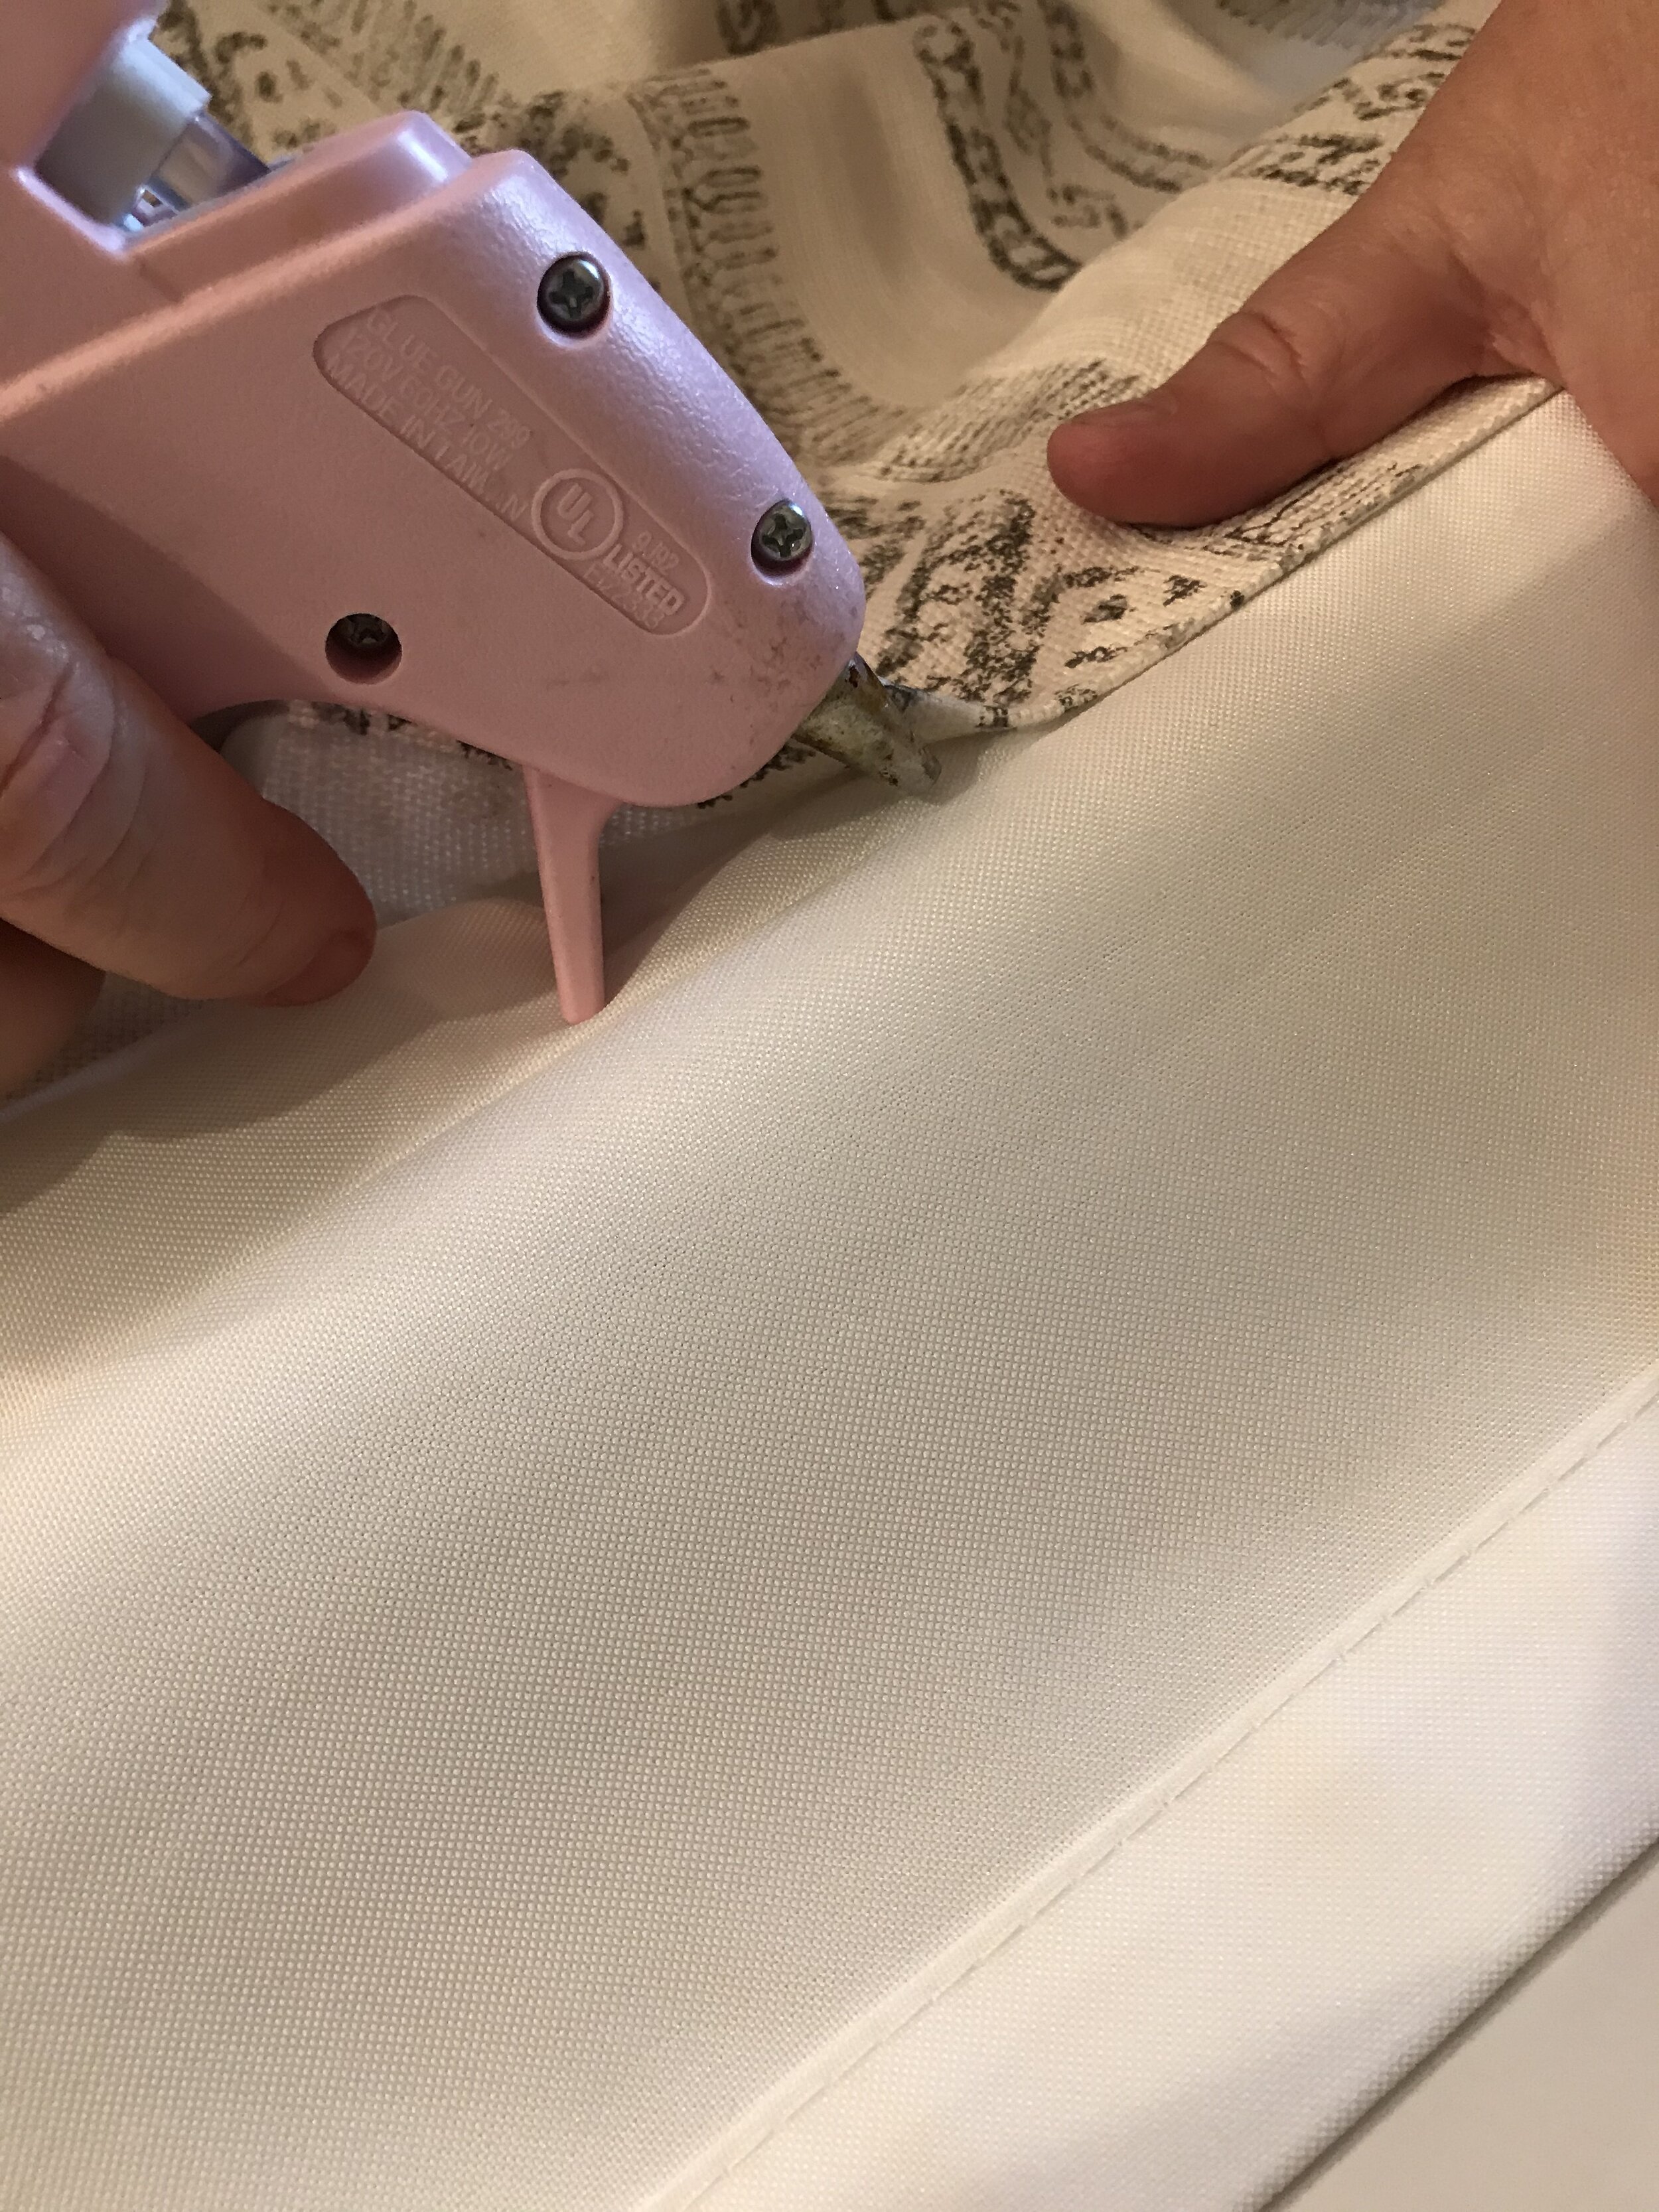
THREE // For the next several steps, your work in sections on the Roman Shades. Pin the of the fabric to the Roman Shade. On each seam, you're going to glue the fabric down, gluing the fabric to the seam creates the beautiful Roman Shade folds.
* We also used straight pins and pinned slighted above the fabric before gluing the fabric on the seam to keep everything straight.
Repeat until you at the very end, give yourself a two-inch seam allowance and cut the remaining fabric. This fabric you will use to cover the valance. Fold-over the one inch, iron, and then place the hem tape inside and iron close.
Fold the fabric at the bottom of the Roman Shade, fold another inch and glue the Roman Shade down. This will create a nice finished look.
we worked in small sections, gluing the fabric to the seams…don’t over-glue you don’t want the glue to show through.
we did not glue the sides of the fabric to the roman shades, only the seams.


DIY Roman Shade Valance
If your using the Arlo Roman Shades, then you notice the valance it’s attached the roman shade and the Roman Shade is Velcro onto the blind header.
If your using a pattern make sure the pattern for the valance is perfectly aligned
For the top of the Roman Shade fold-over the fabric one inch, iron and then place the hem tape inside and iron again. Glue the top of the hemmed fabric on the top of the valance. Next fold over a one-inch seam, hem and then fold over underneath the valance, fold another inch glue. In the picture below, I’m working on the valance.


LOVE THIS PROJECT, PIN IT
I hope you love this how-to project and you’ll soon be making your own DIY Roman Shades for your home. Please let me know if you have any questions about this project! I’d be happy to answer.


