
Hello and big Welcome to Week Three of One Room Challenge. As I move further into the design and execution of my transforming my Cottage Studio, I’m getting so excited. Little by Little, this space is feeling transformed. Quick reminder, One Room Challenge is all about the process of re-imagining a space in 8 weeks and sharing the design process from start to finish. This round of One Room Challenge, I’m thrilled to be a Featured Designer, every Wednesday on my blog for 8 consecutive weeks, I’m sharing the process of giving my backyard cottage studio a makeover inside and out! Be sure and check out my previous weeks linked below
Cottage Studio Exterior Design Plan
I’m so excited to share the progress of my cottage studio, my project list for week three, and my exterior plans! Last week I shared the design board for my cottage studio, which details all the elements I plan to implement into my space. The weather in Sacramento has been perfect, which means I need to start working implementing my exterior changes to the cottage now, before the Summer heat hits! My idea of fun is not doing yard work in a 100+ degree weather, you feel me!
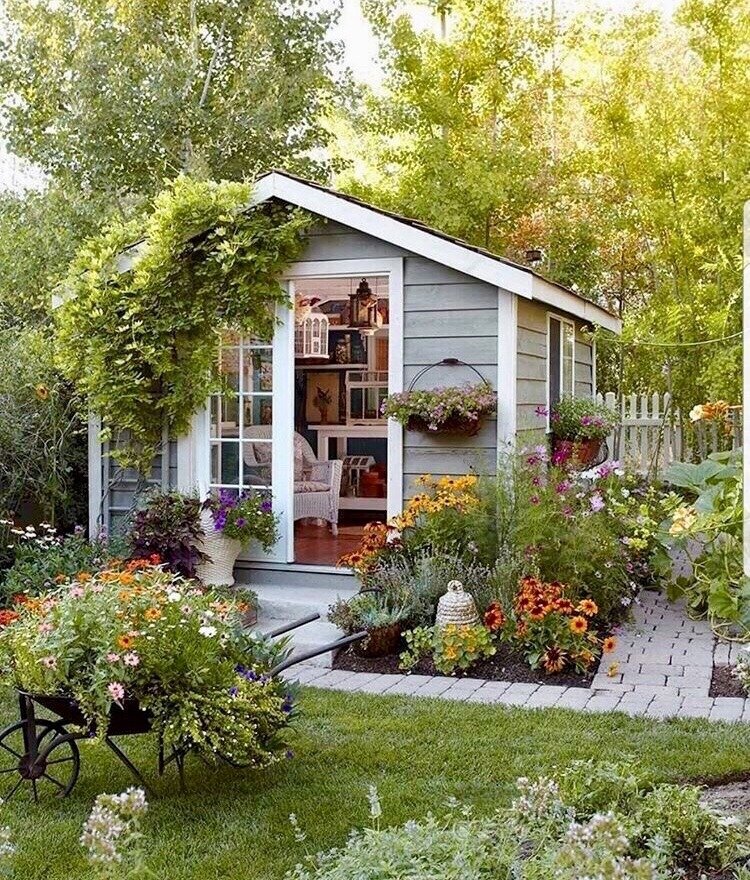
It’s taken me a while to land on a design plan for the exterior of my cottage, I had some design aspects in my mind, but nothing was concrete. Whenever I get stumped tackling a design project, I go back to my original inspiration source and look at the elements I love and that inspire me. My goal for the exterior of my cottage is to make it look very intentional in our backyard and up the charm factor, and well make it look like a mini cottage. I want the little garden bed in front of the cottage to be overflowing with flowers variety of flowers. Currently, two flower types dominate the garden beds. I plan on moving my existing potting bench to the empty side of the cottage, which will give that area of my backyard more depth (plus free-up space for shrubs in another garden bed) This coincides with shopping my home and re-purposing ‘things’ I already own.
The step in front of the cottage needed a re-do, at first I was thinking of using Trex Decking to build a little step, but after coming across this pin. I was super inspired. I’ve been a long-time reader of Jenny of Juniper Home and love her blog. I loved the little playhouse she built her kids and I loved the paver stone steps she built! I’m going to DIY a Paver Stone Step for my cottage and using the same pavers build a little pathway in front of the garden bed.
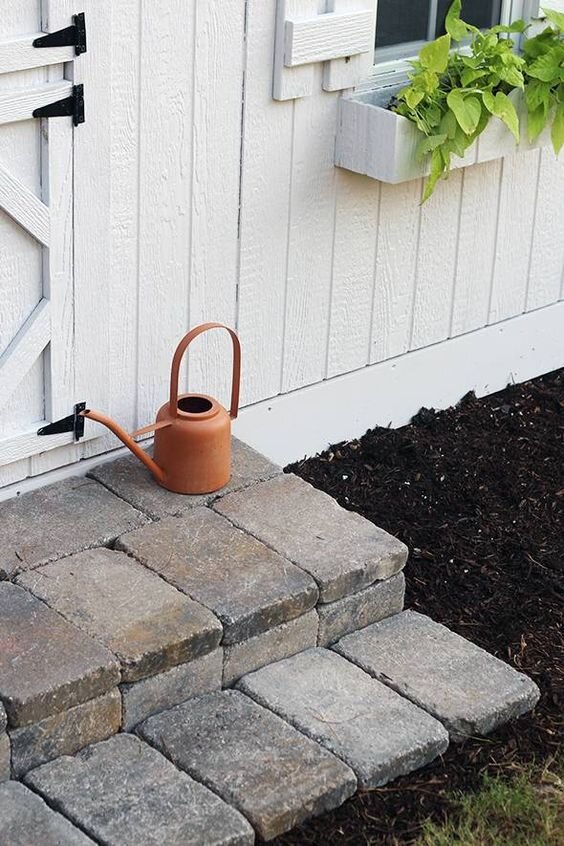
images via Juniper Home and The Visual Vamp
We currently have large pavers in our yard that create a path to our patio, but I’ve never been a fan. After talking with Hasani we decided to move them and use them as a base for the potting bench and skip the pathway. It doesn’t rain much here and on the days it is raining I’ll wear my rain boots to walk to the cottage through the grass.
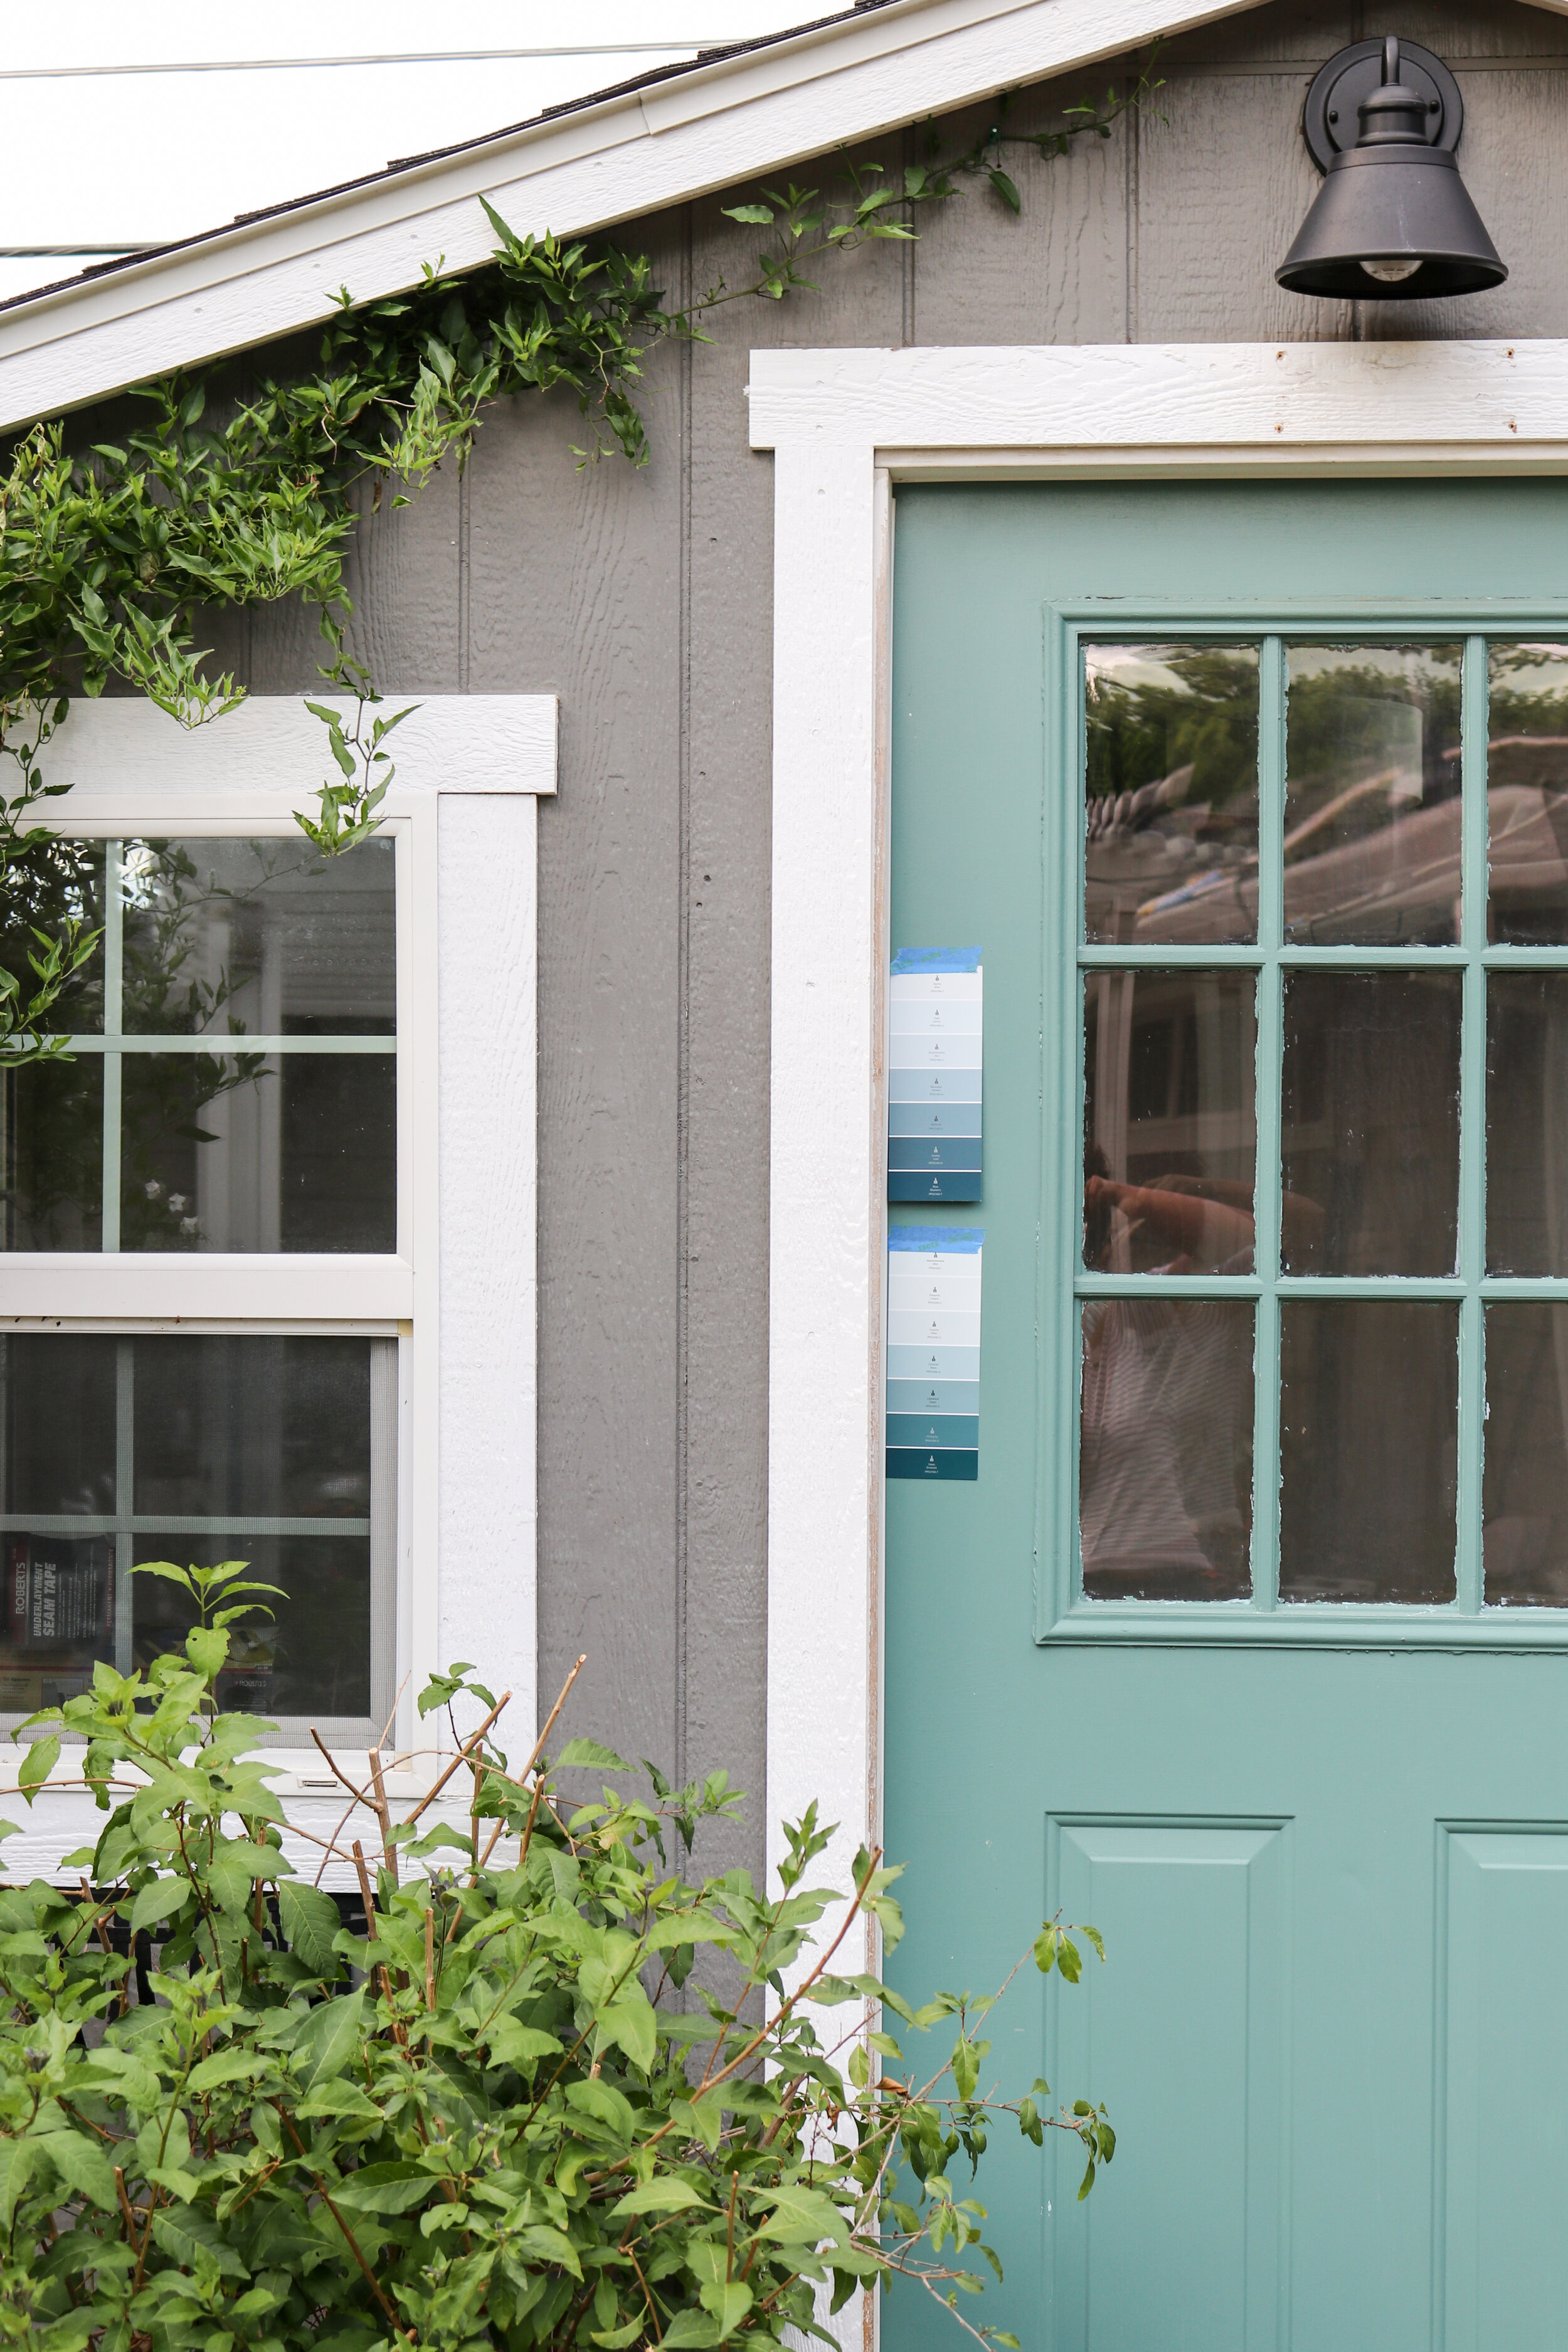
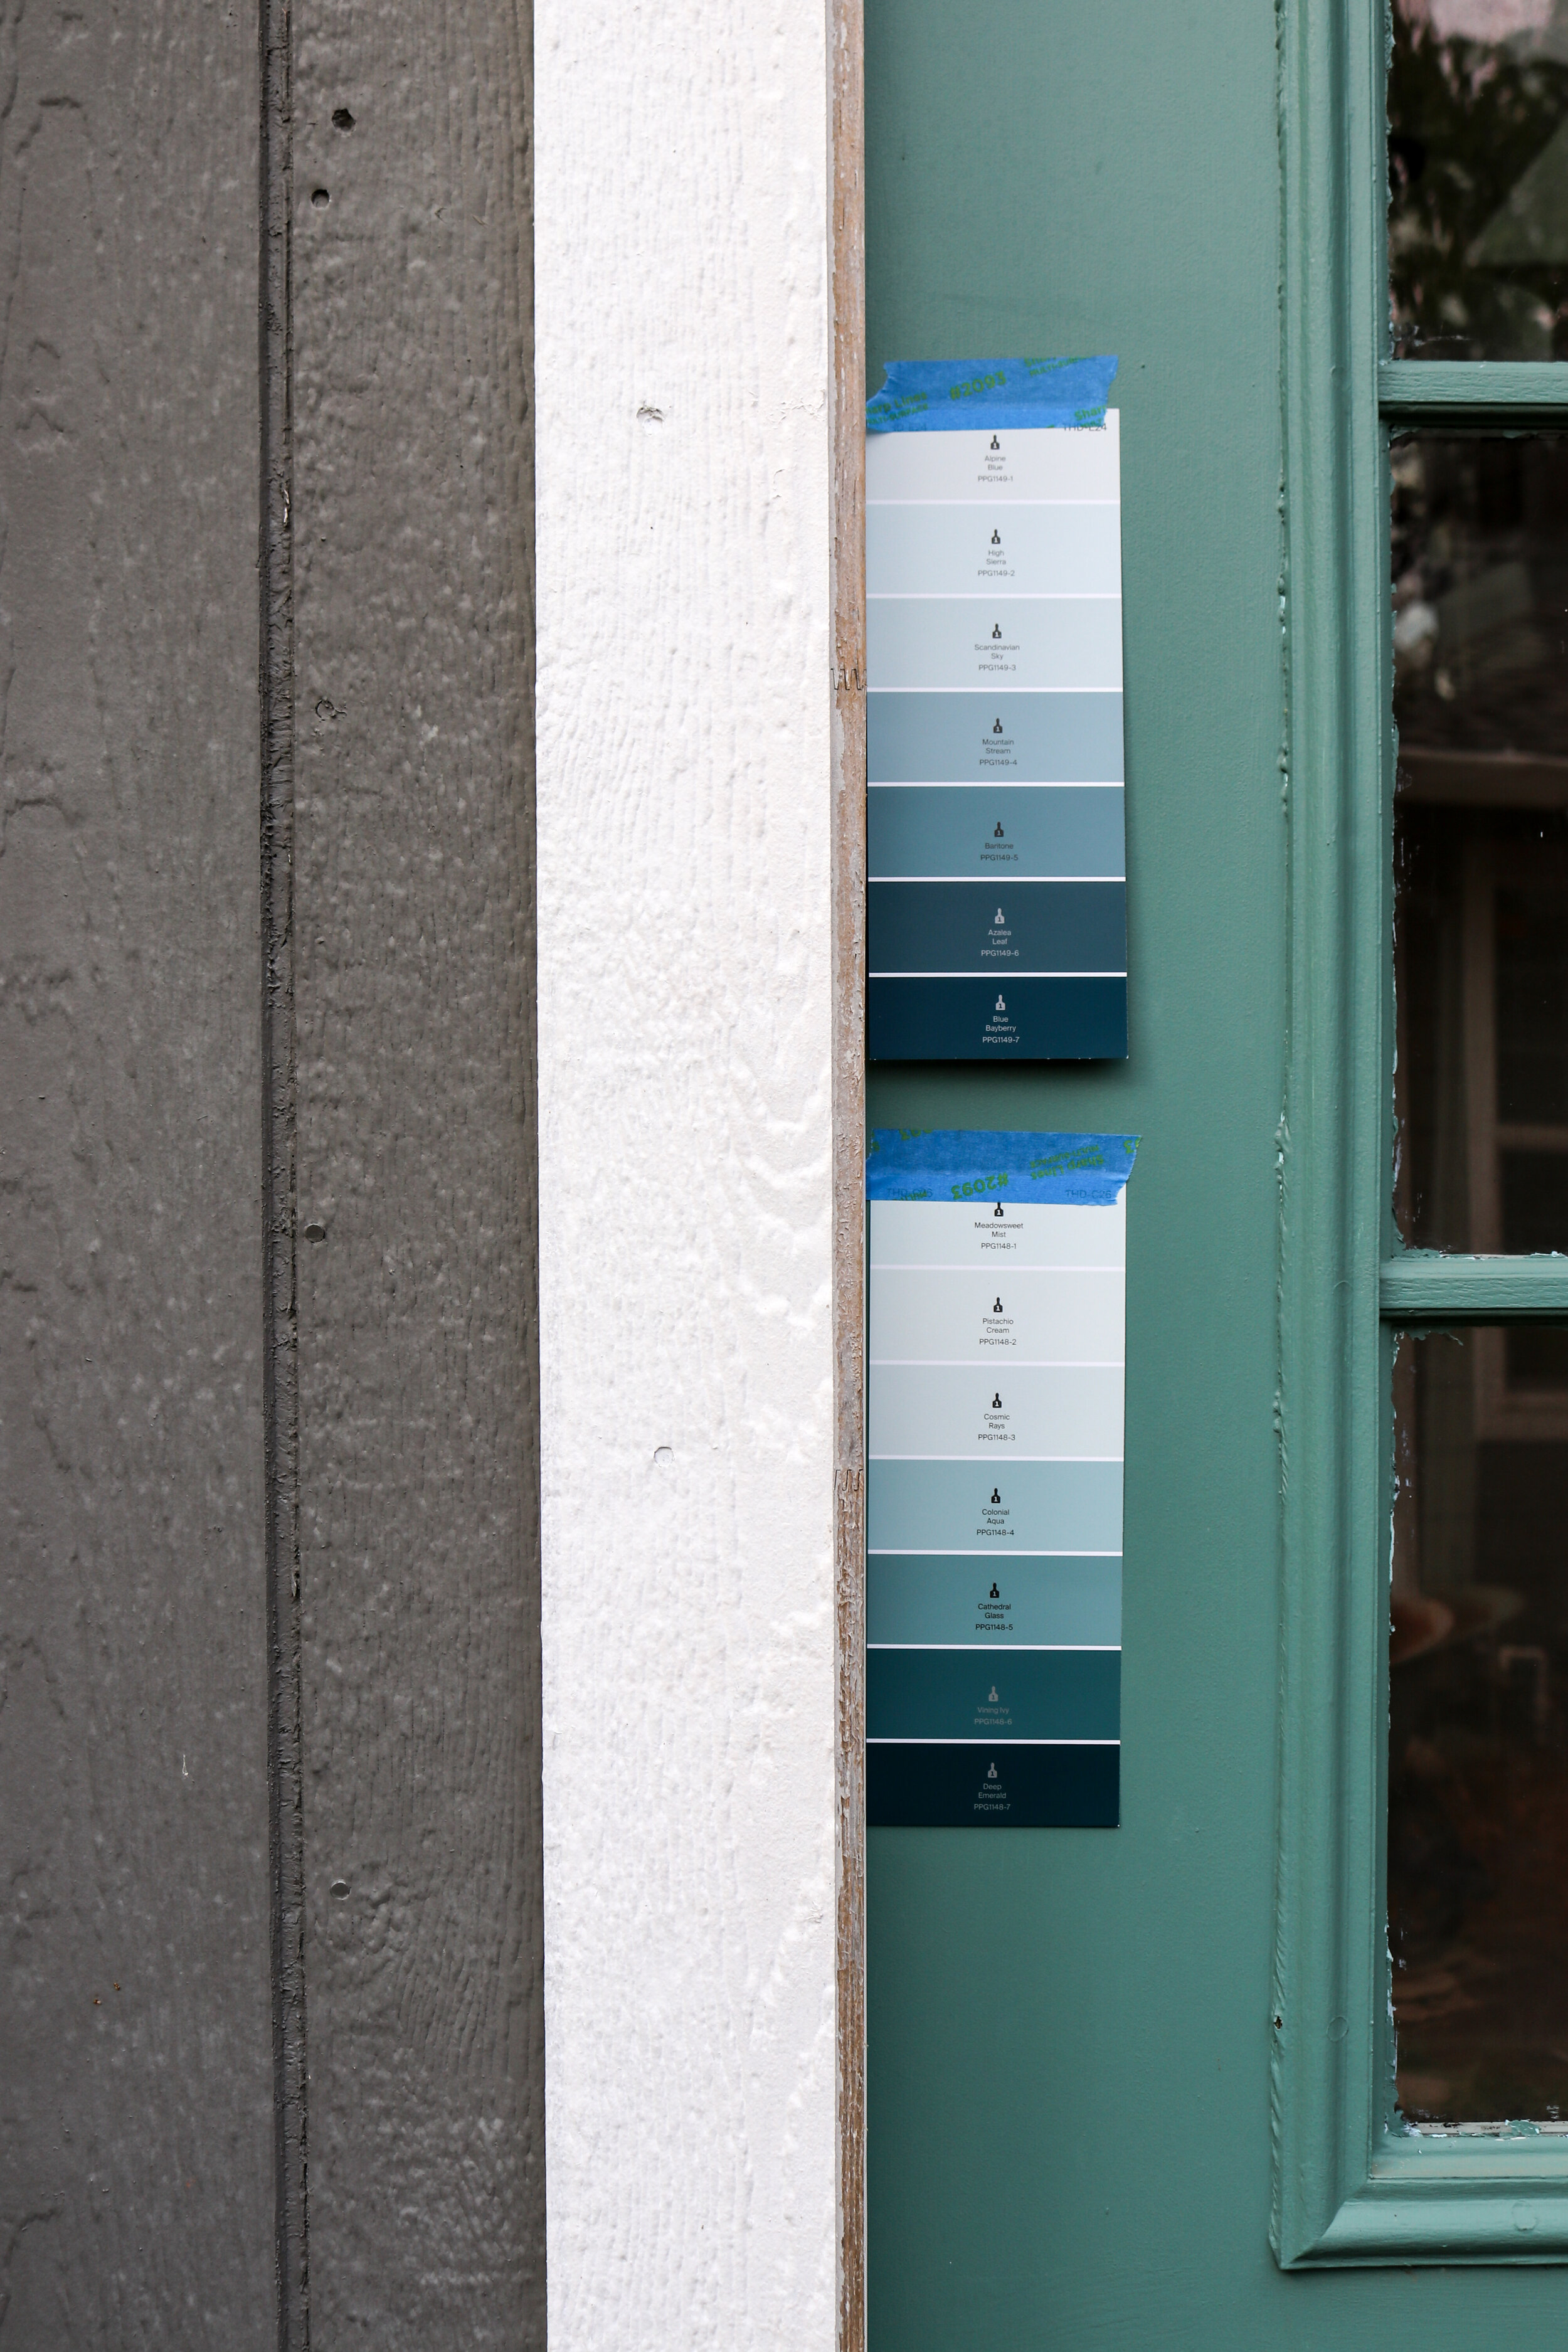
After polling everyone over the weekend on Instagram, I got the push to paint the cottage front door! I landed on a pretty blue-green shade called Bariton from Glidden. I’m painting the door this week! The exterior of the cottage will stay the same color as my house and I’ll give the trim around the door a fresh coat of Ultra White Paint my Behr.
PRO TIP // When looking for the perfect paint color for your front door. Tape paint swatches on the door and to see how the color looks throughout the day. Remember in full sun the color will look more washed out and read lighter. I also love buying small paint samples and painting large swatches on paper and having them or painting large swatches directly on the door.
The front door hardware is getting a big upgrade, YAY! I quickly fell in love with Transition Heritage Monolithic doorstep from Emtek Hardware in a beautiful Stan Brass finish. The door hardware is amazing and it’s going to take the door of the cottage to the next level. The hardware I selected comes in seven different finishes and Emtek lets you customize the inside handle of the door. You can go with either a knob or lever pull. For my door hardware, I choose the L Squared level pull. The hardware feels like jewelry on my cottage door inside and out! Below is my Exterior Design board for the cottage!

Sources: CedearLast Potting Bench (out of stock) Similar Cedar Potting Bench, Emtek Door Hardware, Matte Barn Light, Concrete Planter
One element of the exterior of my cottage that is still influx is the lighting! I have a few lighting options in mind and I can’t decide! I love mixing and matching finishes and decided on a black. finding the right light has been tricky, for a few reasons. The light fixture is located above the cottage front door, there’s not a room above the door for a large gooseneck. Here’s three below that have caught my eye.
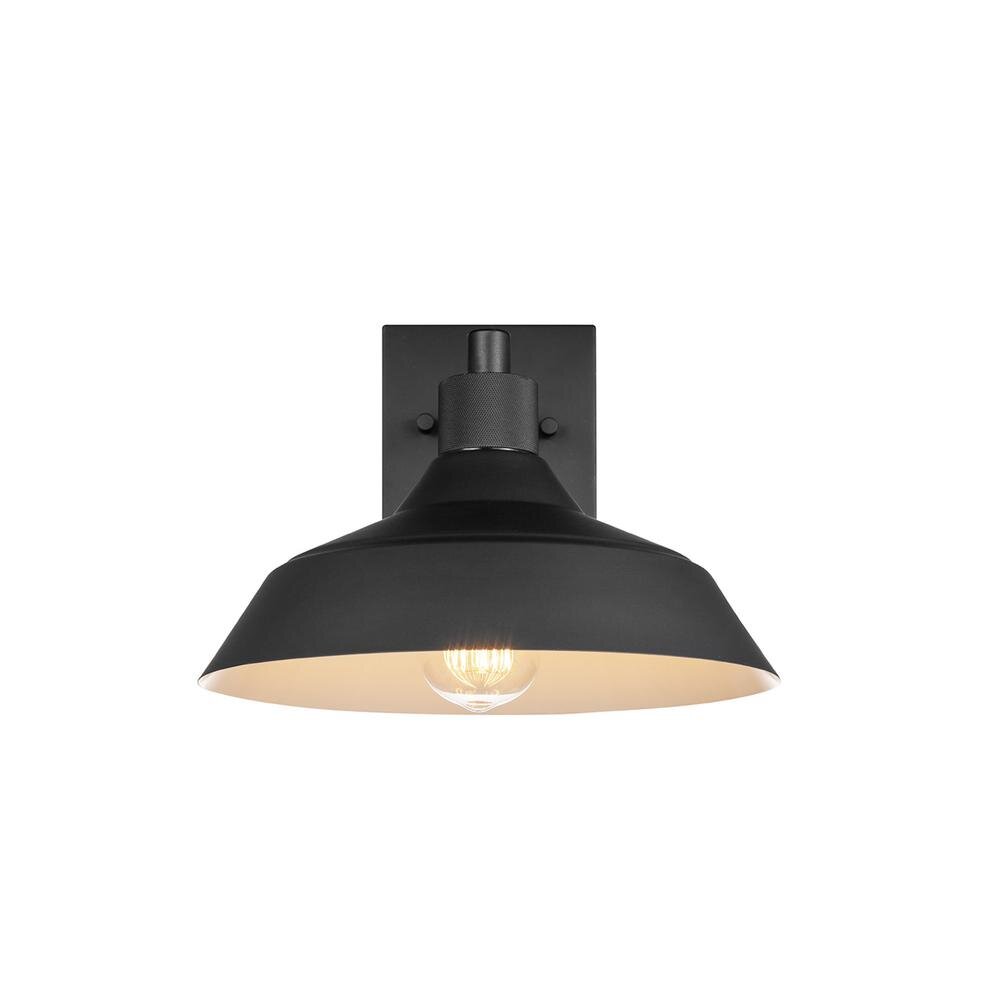
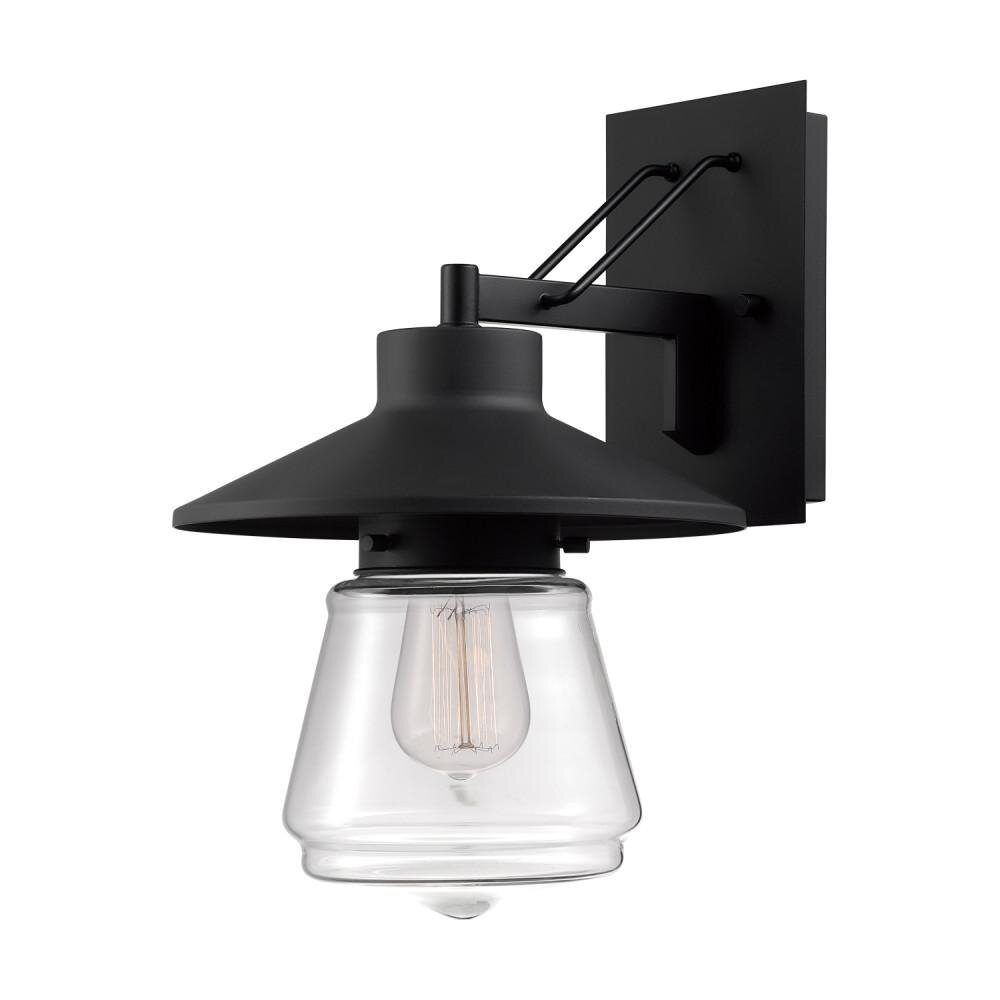
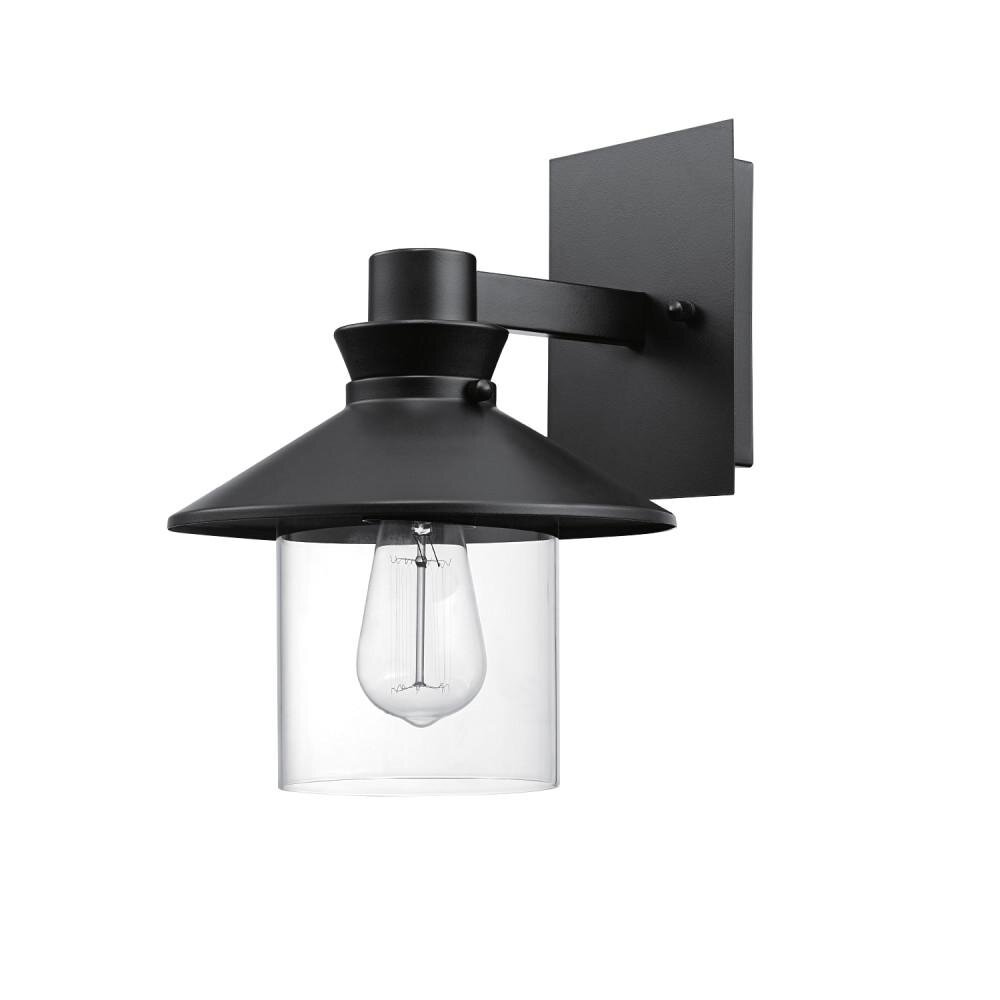
Shop the Look

Cottage Studio Updates // New Flooring
On Saturday Hasani and I installed the new flooring and its a #GameChanger. After looking samples at The Home Depot, I fell in love with Pergo Outlast+ Flooring in Marigold Oak . The flooring looks incredible and I’m so happy with how it looks! The installation process went pretty smooth! I used the online calculator on The Home Depot website to help determine how many boxes of flooring we would need, the estimator suggested seven boxes, we ended up using six boxes and returning one box. Before installing the new flooring we laid down Pergo FloorMate underlayment, the underlayment has built-in tape which makes it super easy to install.
To install the flooring we used Laminate Flooring Installation Kit, which includes spacers, tapping block, and pull bar along with Rubber Mallet. These tools made the installation so much easier, the Pergo Outlast+ Flooring. The flooring is waterproof, which makes the installation tricker than typical laminate flooring, all the joints have to be completely locked in. Once we got the hang of the installation it took a little over four hours.

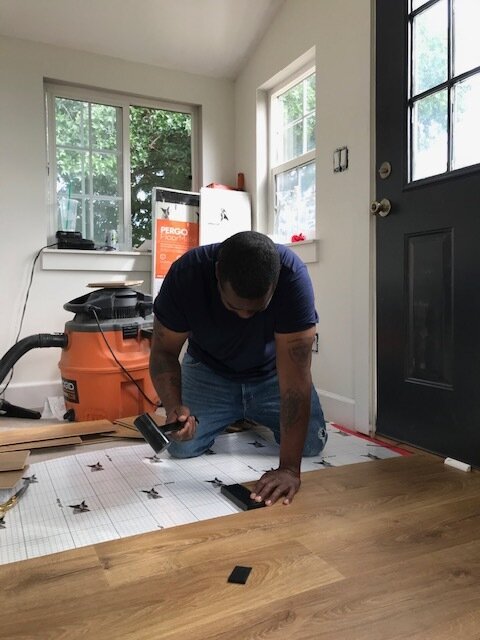


Next up, we’ll install quarter round molding to complete the floors. I’m so thrilled with how everything turned out and I’m in love with the floors. The Marigold Oak is a beautiful modern natural oak color and is so warm and helps make the small space appear spacious.
WEEK THREE PROJECT LIST //
Cottage Studio Interior
Install Quarter Round Moulding
Caulk & Paint Trim + Touch up walls
Paint Interior Cottage Door Downtown Grey
DIY Roman Shades
Cottage Studio Exterior
Scrape Old Paint Around Glass, Caulk Around Exterior Window Frame and Paint Exterior Door
Build a DIY Paver Stone Step and Paver Pathway
Move Potting Bench on the side of Cottage
Install Door Hardware
Please follow me on Instagram I will share all the behind the scenes details, the good and the bad! I can’t wait to have a creative office space again, that feels like me and gets me excited to get some work done! Next week, I have some major pieces arriving for the interior of the cottage and I’m super excited!
PLEASE CHECK OUT MY FELLOW ONE ROOM CHALLENGE FEATURED DESIGNERS BELOW
A Glass of Bovino | Beginning in the Middle | Beth Diana Smith | Clark + Aldine | Coco & Jack
Deeply Southern Home| Design Maze | Dwell by Cheryl | Erika Ward | Home Made by Carmona
House of Hipsters | Hunted Interior | Kandrac & Kole | Kate Pearce | Katrina Blair | Liz Kamarul
Veneer Designs| Rambling Renovators | Renovation Husbands | Studio Plumb | Media BH&G


The real MVP’s of the One Room Challenge are my Design Collaboration partners for believing in me and being so supportive and making everything come together. Huge thank you to my ORC Design Collaboration Partners: APT2B, Calico Corners, Emtek Hardware, Handy Products, Hudson Valley Lighting, Velux, and Scandinavian Designs.
I can’t wait to hear your thoughts on my Exterior Design Plans for my Cottage Studio! What exterior lights do you love the most? And most importantly, what do you think of the new flooring? Are you blown away, like I am! Sound off below.


