Living Room Update: Jute Rug Addition / Addiction

For the past couple of months, I've been wanting to make some changes in my living room and freshen it up. While, I love the flat weave rug in our living room and the color grey. It was just too much grey, grey sofas + grey walls + grey rug = grey overload. One of the cool things about having hardwood floors in your home, is they can handle loads of color. After looking at a slew of rug options, I came to the conclusion a natural fiber rug for our living room would be a fantastic option and look timeless. 

I'm a modern girl at heart I love clean lines and non-fussy spaces and I also love classic elements in rooms that look good year after year. I'm all about staying power when it comes to my foundation pieces in my home. I've been a fan of natural rugs for quite sometime, specially woven jute rugs. Prior to re-building our floor, we had a jute rug in our living room. Jute rugs just look so timeless and can be a great foundation for laying another rug on-top. After searching high and low, I found a fantastic Woven Jute rug, and I'm in love! 

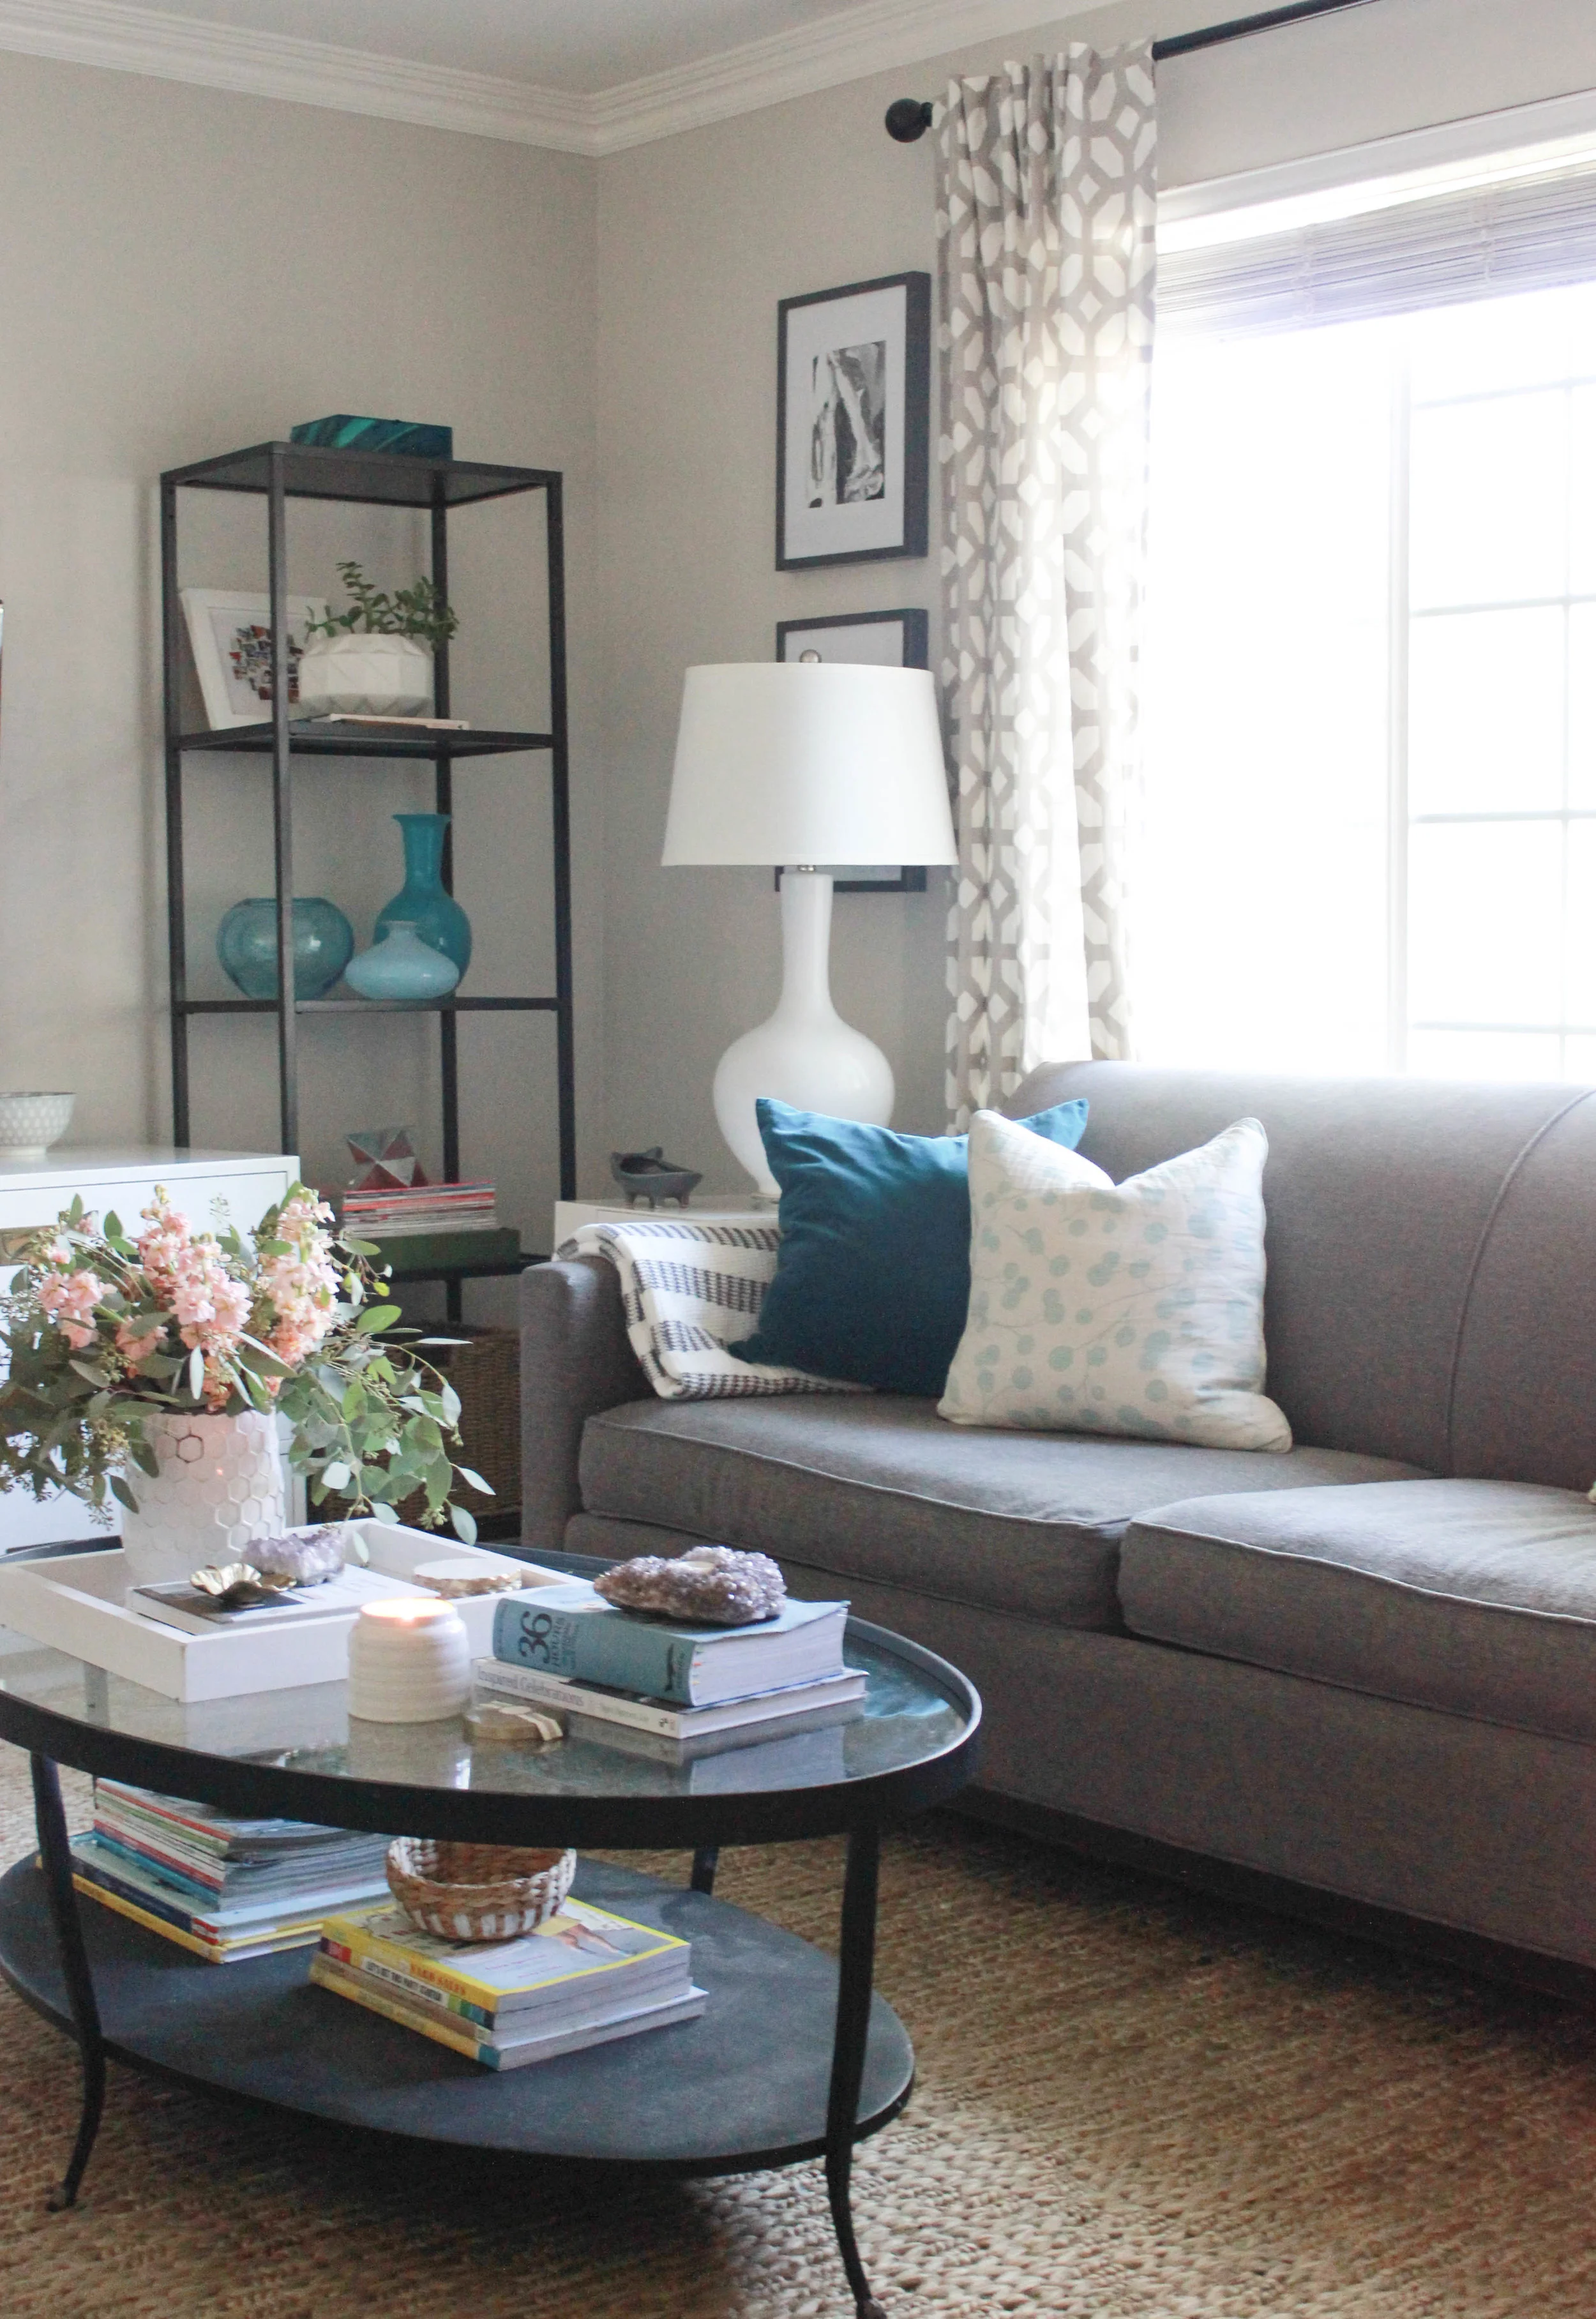
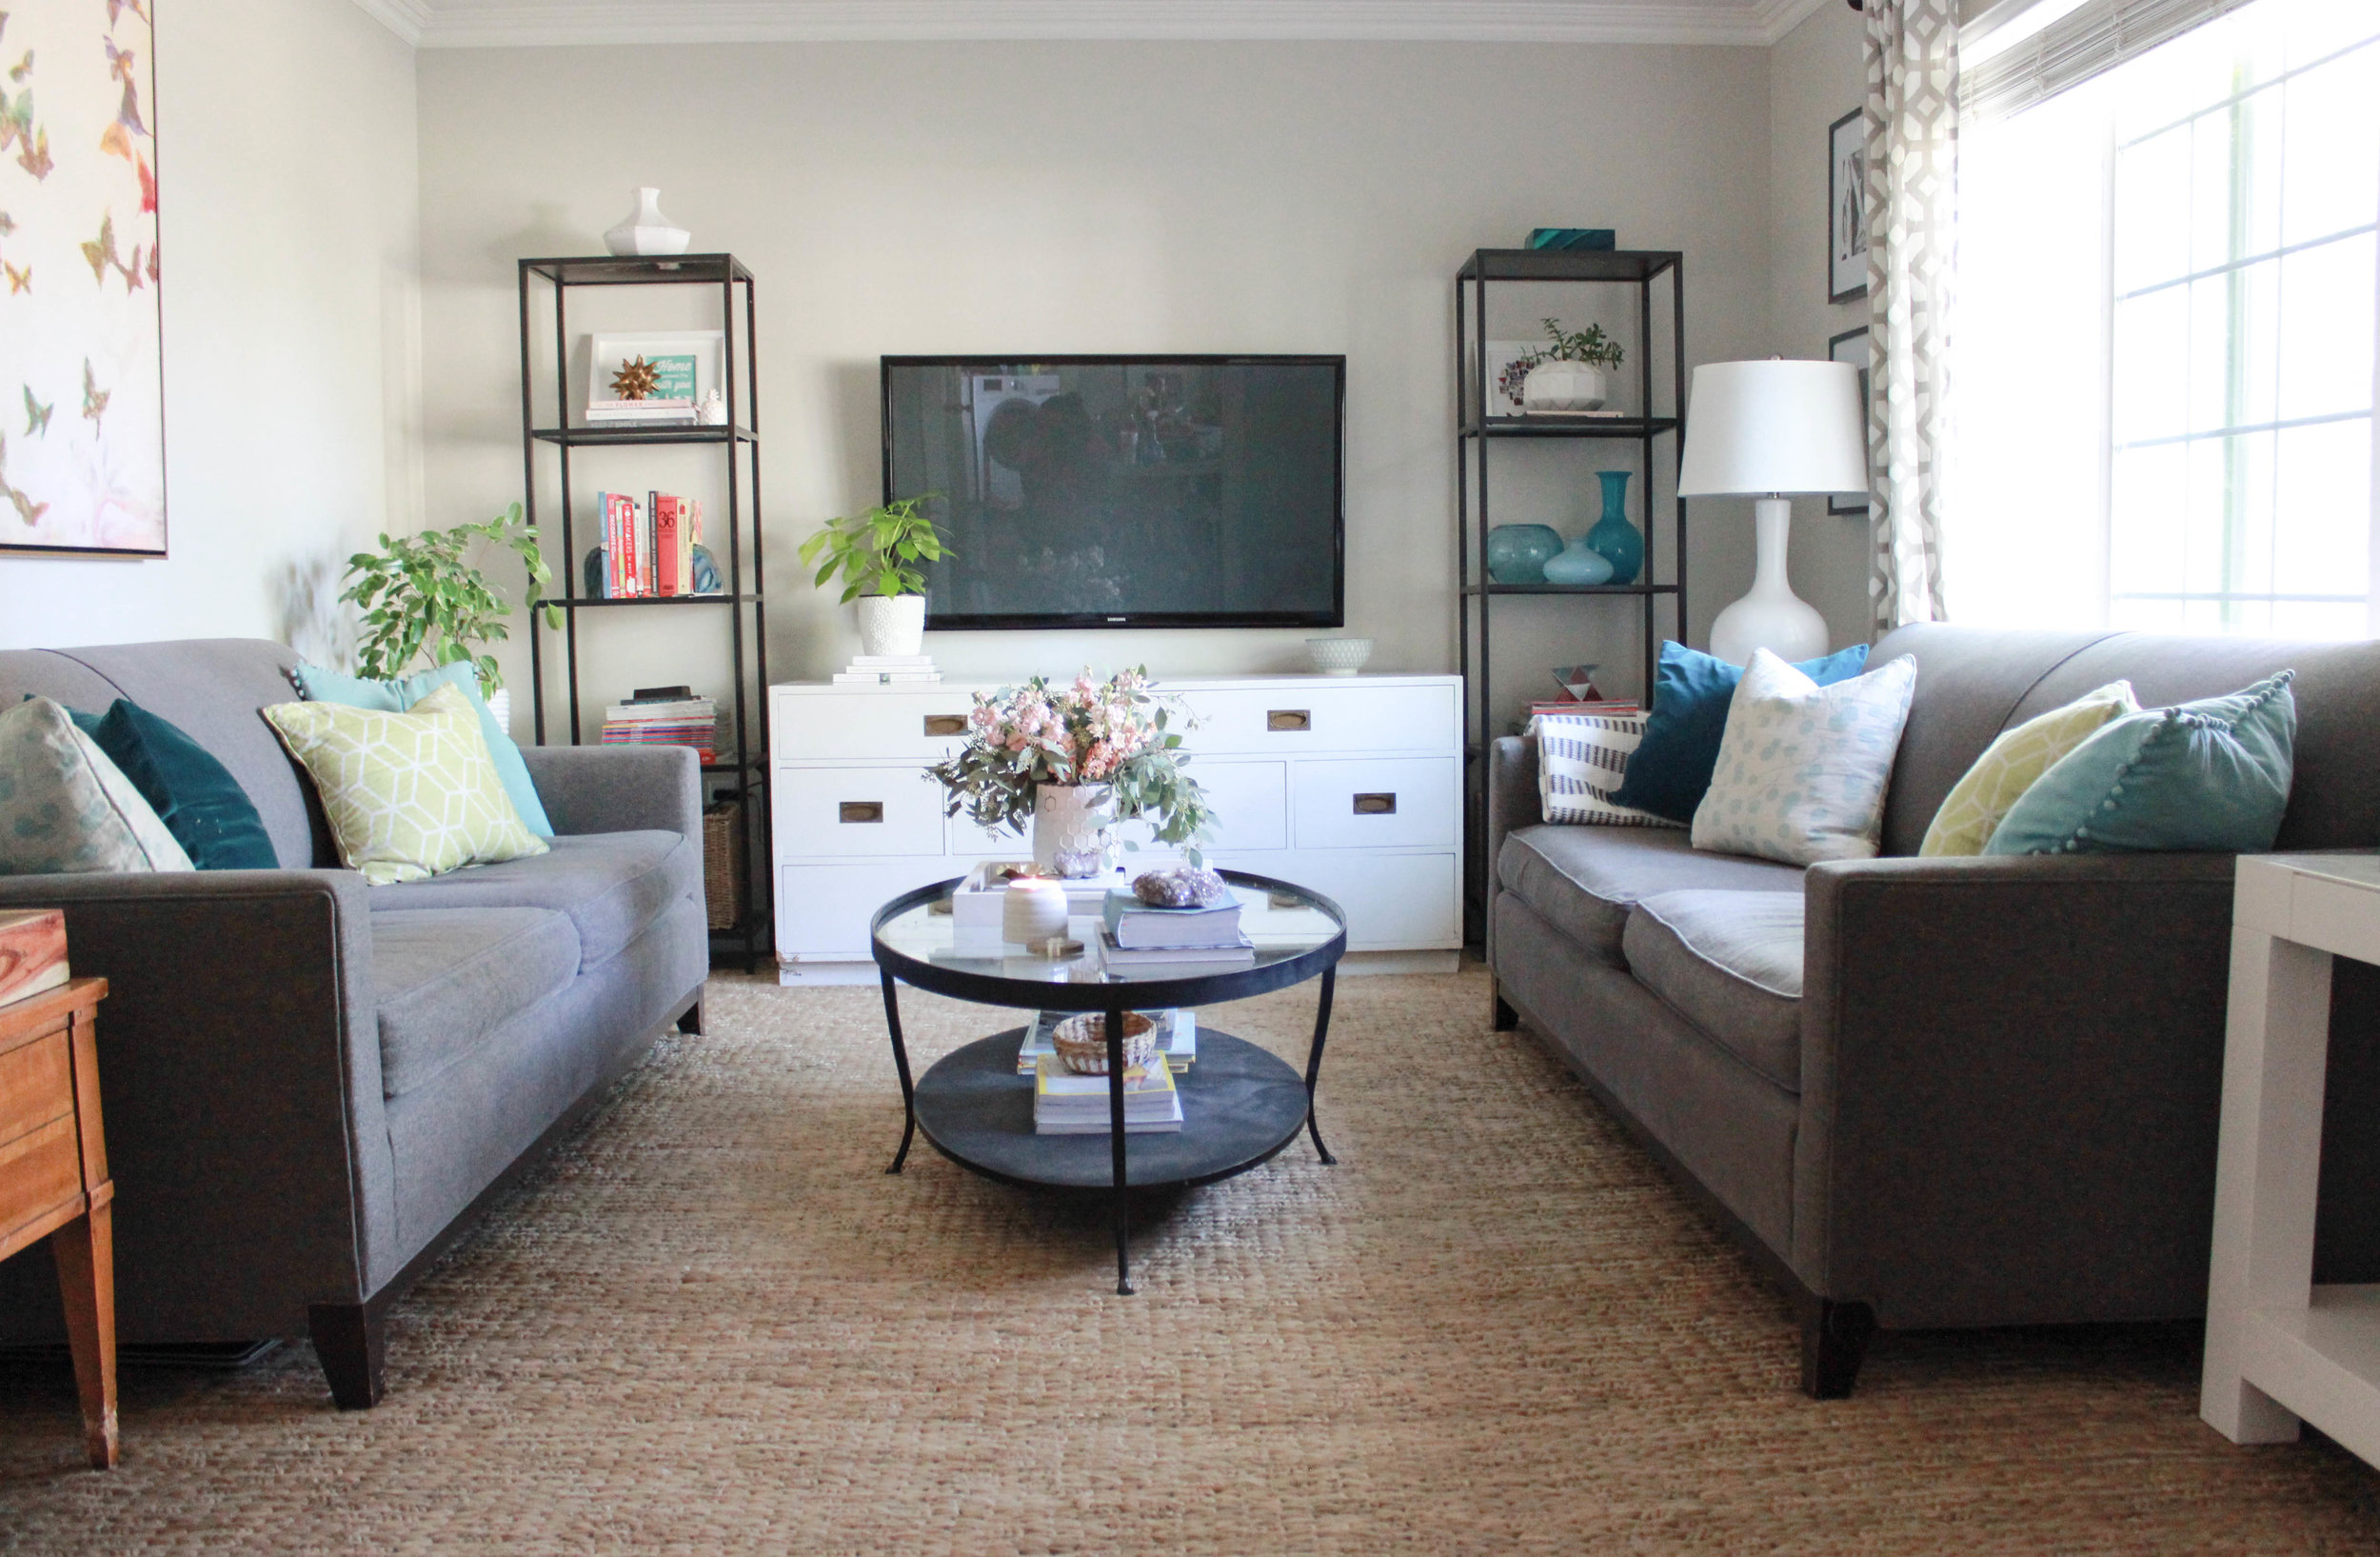
Our new rug arrived about three weeks ago, and I wanted to make sure I absolutely loved the rug before sharing all the deets on the blog. I ordered the Barley Twist Jute Natural rug from West Elm for an incredible price, only $399 for a 9x12 rug. Which was a total steal! I was a little nervous to pair a natural color rug with my grey sofas, but they look so fantastic together. 

I'm also happy, I went with a larger area rug this time, the 9x12 rug fills out our small living room nicely and basically floats in the room, with about 1.5 feet to spare. Another plus, is the light color and larger size helps to create the illusion our living room is bigger by drawing your eyes down and out. We placed the new rug over our existing rug pad to give the jute jug extra cushion + help protect our hardwood floors.    

Barely Twist Jute Rug Pluses & Negatives 

  • The woven pattern & design look fantastic both in real life & in person
  • The bottom of the rug is almost flat woven like, nagative - the rug can;t be flipped
  • Its pretty soft underfoot, but can feel a little bumpy
  • We've experienced a little shedding on the rug, which is normal since its made with natural fibers 

I was a little nervous to unroll the rug since our puppy is only 8 months, I was mostly concerned with him getting overexcited and marking our rug! I was also nervous about his nails potentially getting caught in the rug. So far all my fears, haven't happened! Our puppy seems to like layer on the rug.

I'm seriously smitten & addicted to Jute rugs, they're perfect options for high traffic areas. My family spends a lot of time in our living room and this rug will for sure get a lot of action. Next up on my list to update in our living room, pillows. You all know how much I love pillows and now that my floors have gotten some love, its time to give my sofas some love with new pillows. I freaking cannot wait until the goodies arrive in my mailbox, I'm so ready to do a happy pillow dance. I'll share more pictures of our living room, along with some additional changes I'm considering making to our space once the pillows arrive and are in place. 

What time of rug do you have in your living room? Are you a natural fiber rug person too?  What do you think our new rug? 

How to Effortlessly Give Grocery Store Flowers a High End Look

Every week, I treat my home to fresh flowers, I love stopping in my local grocery stores flower department or going to my favorite farmers market and looking though the flowers and bring home a bunch. Some people feel buying flowers for your home is waste of money I totally feel the opposite. Just like plants, flowers bring some much life into a room & look stunning on coffee tables and dining room tables. I typically spend $6-$12 a week on flowers, so basically 2-3 Venti lattes. I don't know about you, but I so prefer flowers over lattes. 

My favorite part of flower shopping is dreaming up how the flowers I select will look in a pretty vase. I always prefer to create my own floral design vs. buying a pre-made bouquet. Plus, get more for your buck flower wise, buying smaller groups of flowers. My favorite part of the process is arranging the flowers. Until recently, my flower designs always felt a little flat. I recently cracked the 'floral design' code and can't wait to share how easy it is to create a lovely arrangement that looks incredible and is thrifty! 

Today, I'm taking you though my flower design process from start to finish on how I effortlessly created the lovely arrangement that's currently on my coffee table, plus sharing what I was doing wrong & what I've learned. My flower mix for arrangement: Dahlias, Sunflowers, Snapdragon and assorted green fillers.  

#1 Must for Big Showy Arrangements

When it comes to creating a pretty flower arrangement, buy fillers or go outside and snip some branches from your trees or bushes. In the arrangement I'm sharing how to create, I spent $4 bucks on fillers that include eucalyptus stems (that smell incredible) and few bush stems and a few sprays of Aster flowers. The advantage of spending a few bucks on filler floral, is they can last an incredible amount of time. So basically you can re-use them week after week! That's four bucks well spent in my opinion. 

Flower Shopping

I always opt for buying the long last flowers: Mums, Alstroemeria, Daisies and Viburnum, Gladiolus and Carnations to name a few. One of my favorites is Hydrangeas, but in my home they can be very finicky (so I always cautiously buy) I find I have best luck buying hydrangeas when I buy them from the Farmers Market. My favorite place to shop for blooms are Trader Joe's, Safeway and Farmers Markets. 

What I Was Doing Wrong 

Remember when I said, I always felt like my floral designs in the past felt a little flat? The main reasons. 

  • I wasn't using my green filler properly, I was just randomly tucking it inside the vase, after my flowers where arranged. Wrong! 
  • I was cutting my flowers the same exact height. Wrong! 
  • I didn't change the water often! You must change the water every 2-3 days and re-snip the stems as needed. Some flowers require extra water, which is a reminder to check the water levels in your vase daily! 

The Art of Arranging Flowers 

ONE: Creating a nice base for your flowers to 'reside' is a must and helps give your arrangement a more full look. Adding green filler also makes your arrangement feel more sculptural. Once I started created a nice base for my blooms, my flower arrangements started looking more thoughtful and layered. Just like the power of paint, don't underestimate the power of using green fillers! Fill your vase with water and place the eucalyptus inside first as the base for your arrangement. Eucalyptus branches are long and fluffy and look best leaning outside the vase to create a more organic look. 

TWO: Even out the arrangement with the additional filler branches on the opposite side. Be sure to remove any foliage from the bottom on your stems, you don't want them sitting in water. 

THREE: Next, I added the reaming filler flowers of Aster to complete the base of my arrangement, before adding in my blooms. I cut my Aster flowers at various heights to help fill out my large vase. 

FOUR: Begin adding in the snapdragon flowers, cut the flowers in varying heights and add the flower stems throughout the vase. Snapdragons are such pretty flowers, that help add that extra oomph in arrangements. Plus snapdragons are super thrifty addition, Trader Joe's sells eight stems for $3.99 and they really go a long way. As you can see, its amazing how full the vase looks even before I add the main flowers to the vase. 

FIVE: The key to artfully creating a pretty flower arrangement that's pleasing to the eyes is cutting the main focal flowers at varying heights. In my arrangement, I cut the dahlia flowers at different heights, placing the taller flowers in the middle and shorter ones towards the front of the vase. I also placed the un-opened dahlia buds in the vase to give the arrangement a fuller look. 

SIX: To add a punch of color to my white and rose colored arrangement, I added two sunflowers. I added one high in the middle of the arrangement and one towards the front of the vase. I love the surprise punch of color the sunflowers give the neutral arrangement + they look so pretty mixed in with the snapdragons and dahlias. Now step back and admire all your pretty work! 

I love how my flower arrangement turned out. Once you break down all the steps into putting together an arrangement, its super easy and thrifty to create a lovely big showy arrangement for your home.  I spent around $14 bucks on the arrangement, keeping in mind that $4 of my the money I spent was on the fillers (eucalyptus, various bushes & aster) that I'll re-use for several weeks getting my moneys worth. I hope my tips help take your next flower arrangement to the next level of pretty! 

What are your favorite flowers to arrange? Are flowers also on your weekly must-have list for your home too?