
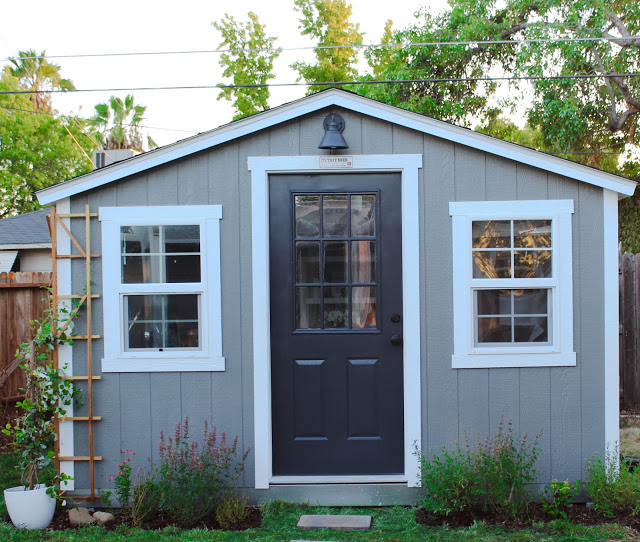
Have you seen, my finished She Shed Project with Home Depot on their Apron blog? I recently shared the completed version of transforming a TUFF SHED from top to bottom into my creative hub for all things Design and DIY. Once my sweet shed arrived, I couldn't help but rename it, the cottage studio it just felt to fitting. I love the idea of having a backyard cottage that's full of purpose and creativity.
While its always fun to a see a before and after, personally I also love to see how spaces progress from bare bones in my cottages case from just studs on the inside to a fully finished studio on the inside with electric and air conditioning.
Planning Process
When we started the planning process for the shed, when checked with the city with live to determine if their were any zoning restrictions on installing a 10x12 shed in our backyard. In the city we live in Northern California, they have strict guidelines for how tall, how many square feet and how close a building can be with property lines before requiring a building permit. Working closely with Tuff Shed we made sure to stay within those guidelines. We choose a
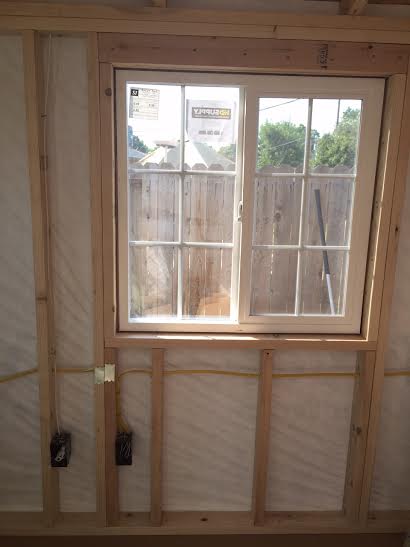
and a nine light door, framed by two 24x36 windows in the front and two 36x36 windows on either side. I kept the back of the wall window free, since I envisioned bookcases filling the back wall.
Electrical Process
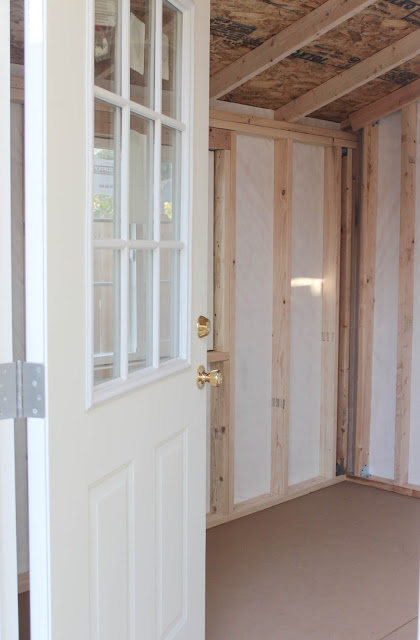
After the Tuff Shed was built [ read more about the process
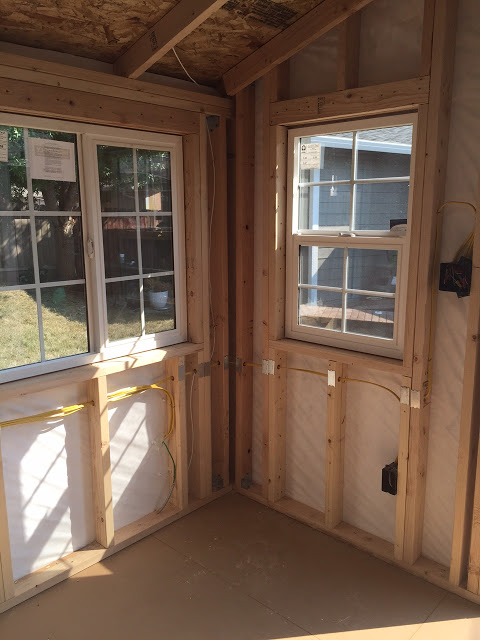
] we had to get ready for electrical. We visited the building and planning department and obtained a permit to run electrical from our house to the shed. Getting the OK to dig to run electrical was super exciting! We had to dig a 20ft trench from the end of our patio where our meter and electrical panel reside to our cottage, the trench had to be 18 inches deep to pass code. Friends, digging a 18 inch trench doesn't sound that deep, unless you have hard-pan soil and rocks the size of dinosaur eggs once you dig deeper than a foot, not my idea of fun. We ended up renting a 18 inch deep trencher from The Home Depot and did a lot of hand digging. Below is an interior picture of the Tuff Shed prior to the electric being run inside. Since we planned on running electric inside, Tuff Shed installed house wrap for us, making sure our shed would be water tight.

My husband and I have experience in changing out light fixtures, updating switches with dimmers but no experience in running power to a building, moving around amps in a main breaker box and installing electrical in an entire building or a sub panel. For this job it made THE most sense in hiring the electrical rough portion of the job out. Rough electrical basically means electrical wiring before the drywall has been covered up, and passed inspection. After receiving many quotes and talking with multiple electricians, we hired
to do the work, Greg the owner of Sconce Electric is simply fantastic! He and I worked on the outlet placement making sure everything was done to code and discussed at length my plans for the shed. I would highly recommend them on both big and small jobs. I'm not getting paid or getting a kick-back for saying this, just passing along good contractors to others.
Inside we have two switches one for the interior light, one for the exterior light fixture, and six outlets that all work! We also had the electrician run electric for an AC unit (details coming in another post) and run a phone line out there.
The day after the electrical was installed, I had my rough electrical inspection and we passed! Passing our inspection meant we were ready for insulation and drywall! The inspector who checked everything out, praised the electricians work and liked that we also choose to install a sub-panel at the shed. This means we can turn off power at both the shed and from our main breaker box. To save a little money on this job, we opted to do the finished electric ourselves meaning once the drywall was hung, we would install the outlets and light fixtures ourselves. Another way we saved money on the electrical was taking the time to get the permit ourselves, vs paying for the electricians time to do it.
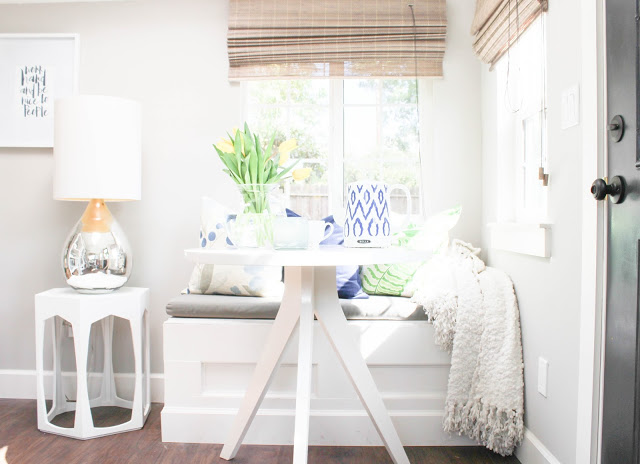
Since I knew I wanted a corner window seat inside my cottage, we placed these two windows on the corner. This is the previous view of the same space! It's amazing how different it looks.
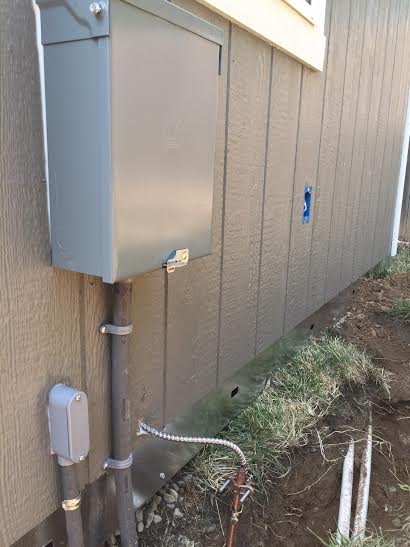
Below is the sub panel installed by our electrician, basically its a mini version of our main breaker box. Quick side note, all the outlets inside our grounded and our outside outlet is a GCFI enclosed in a weather proof outlet box.
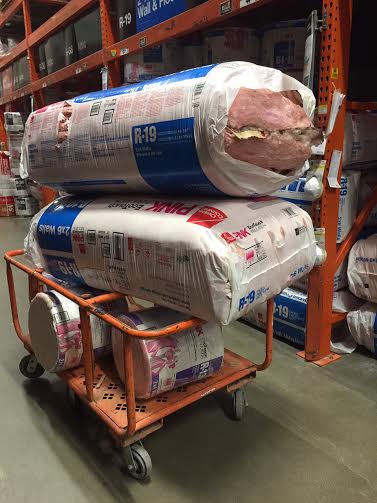
After the electrical was completed, Hasani and I spent an evening installing insulation on the walls and ceiling. To calculate how much insulation we would need to purchase, we used this
calculator
on The Home Depot website. This calculator also helped us determine our R - Factor. When installing insulation, its important to know which type of insulation is need for your walls and ceiling based on where you live.
Next up, I'll share the drywall process. I personally love drywall time, for me its when a room starts taking shape.
Follow Along My Home Depot Project The Cottage Studio
The Cottage Studio: Behind the Scenes Part II


