Welcome friends, I’ve been blogging for years and to this day I still love it! I love looking back and seeing how much my blog and content and photos and blog process as improved. My dear friend Lauren Myers of Color Hug and I put together a fun informative list of our favorite must-have blogging resources physical and digital, that help will help you stay on track, edit photos and streamline your day to day blog/biz tasks.
Here’s a little more about, Lauren is the owner of the colorful company for creative hustlers and bloggers, Color Hug, where she sells colorful products to keep creatives pumped and ready to tackle their day. Lauren also shares blog and biz tips/strategies and teaches tech E-courses for creativepreneurs. If you’re hopping over from Lauren’s blog, welcome! I’m Katrina, on my blog I share my passion for interior design, treasure hunting ,DIY Projects and design solutions for small home dwellers.
10 Must-Have Physical and Digital Blogging Resources to Increase Productivity
Katrina's Tips
Physical Blogging Resources
ONE. Adobe Photoshop Lightroom- Hands down my favorite software for organizing and editing photos is Adobe Photoshop LightRoom. I find editing photos in Lightroom to be an easy process. I’m easily able to brighten pictures, remove hard shadows, boost color when needed and make pictures crisp. Lightroom always keeps a copy the original unedited photo! You can also see the side by side comparison of an edited photo and unedited photo. In addition to editing photos one at a time, you can easily batch edit a group of photos.
TWO. 50MM Lens- The nifty fifty is a #GameChanger! Ever see those pictures where one item is in focus and the background is blurred out? Chances are the photographer used the trust 50MM Lens. I’ve had 50MM lens for about 2 years, it's my favorite lens to use for take close-up photos, low-light and flat-lays. It's a prime lens, meaning its fixed, when taking photos using this lens you'll have to use your body to zoom in and zoom out. Often times when using my 50MM lens, I'm in another room to take a wider shot of a room. Visit Canon & Nikon to look for refurbished lenses, that come with warranties. My 50MM lens is refrusbished one and I've had no problems with the quality and cam with a warranty. A few reasons you need this lens
- very affordable around $130 bucks
- takes amazing close-up photos
- perfect for getting crisp bright photos
- great for taking flat-lay photos
- will help you become a better photographer
PRO TIP: Treat yourself to a step stool, great for taking shooting overhead shots and for table flatlays. The step stool will with you a new view of the photo you're taking
THREE. Lighting Kit- While taking pictures in natural lighting is ideal, it's not always possible. Using a basic continuous lighting for shooting interiors, can help brighten dark rooms and remove dark shadows. If you have products you're selling, having a lighting kit is essential for creating good product shots. You can find an affordable lighting kit on Amazon starting at $35 and up. I own the Cowboy Studio Continuous Lighting kit, the kit came with 3 lighting stands, light bulbs and two umbrellas. I often use my lighting kit when taking pictures of my dining room, to help 'light the room up.'
FOUR. Camera Stand- Having camera stand is essential when taking interior photos! I use my camera stand when I’m taking close-ups, by using a camera stand you’re able to have better control of the photo you’re taking and there’s less chance of blurry photos especially in low light situations. In addition you can capture new angles, and take pictures in tight spaces and get a new perspective while taking pictures. In the photo below of me working in my office, I used my camera stand to capture the image and used the timer feature on my DSLR. Because I used my camera stand, I was able to take this 'selfie' picture without needing anyone else's help and play around with different angles to take the shot.
PRO TIP: Use the timer on your camera for taking 'selfies' and consider investing $10 bucks in a remote for your DSLR. The DSLR remotes are great for taking pictures in tight areas, when your unable to get behind the camera lens.
FIVE. Books for Creatives- Here are a few books for creatives that will keep you motivated to creative content and further tap into your creative side.
- Blogging for Creatives
- Steal Like an Artist: 10 Things Nobody Told You About Being a Creative
- Creative Confidence: Unleashing the Creative Potential within Us All
Lauren's Tips
Digital Blogging Resources
SIX. Evernote- This is an oldie but goodie! Evernote is basically a Note app on steroids. You can do so much with Evernote when it comes to organizing ideas. Evernote is my first stop when it comes to keeping track of ideas. You can create notebooks that are composed from individual notes. Some of my notebooks are named Blog Post Topics, Course Topics, Collaborations and Products. I then have various notes in each notebook for all of my ideas. Since this is also available on mobile, I can add a note on a whim quickly and easily. You can even make notes available offline so even if you don’t have a connection, you can still edit notes!
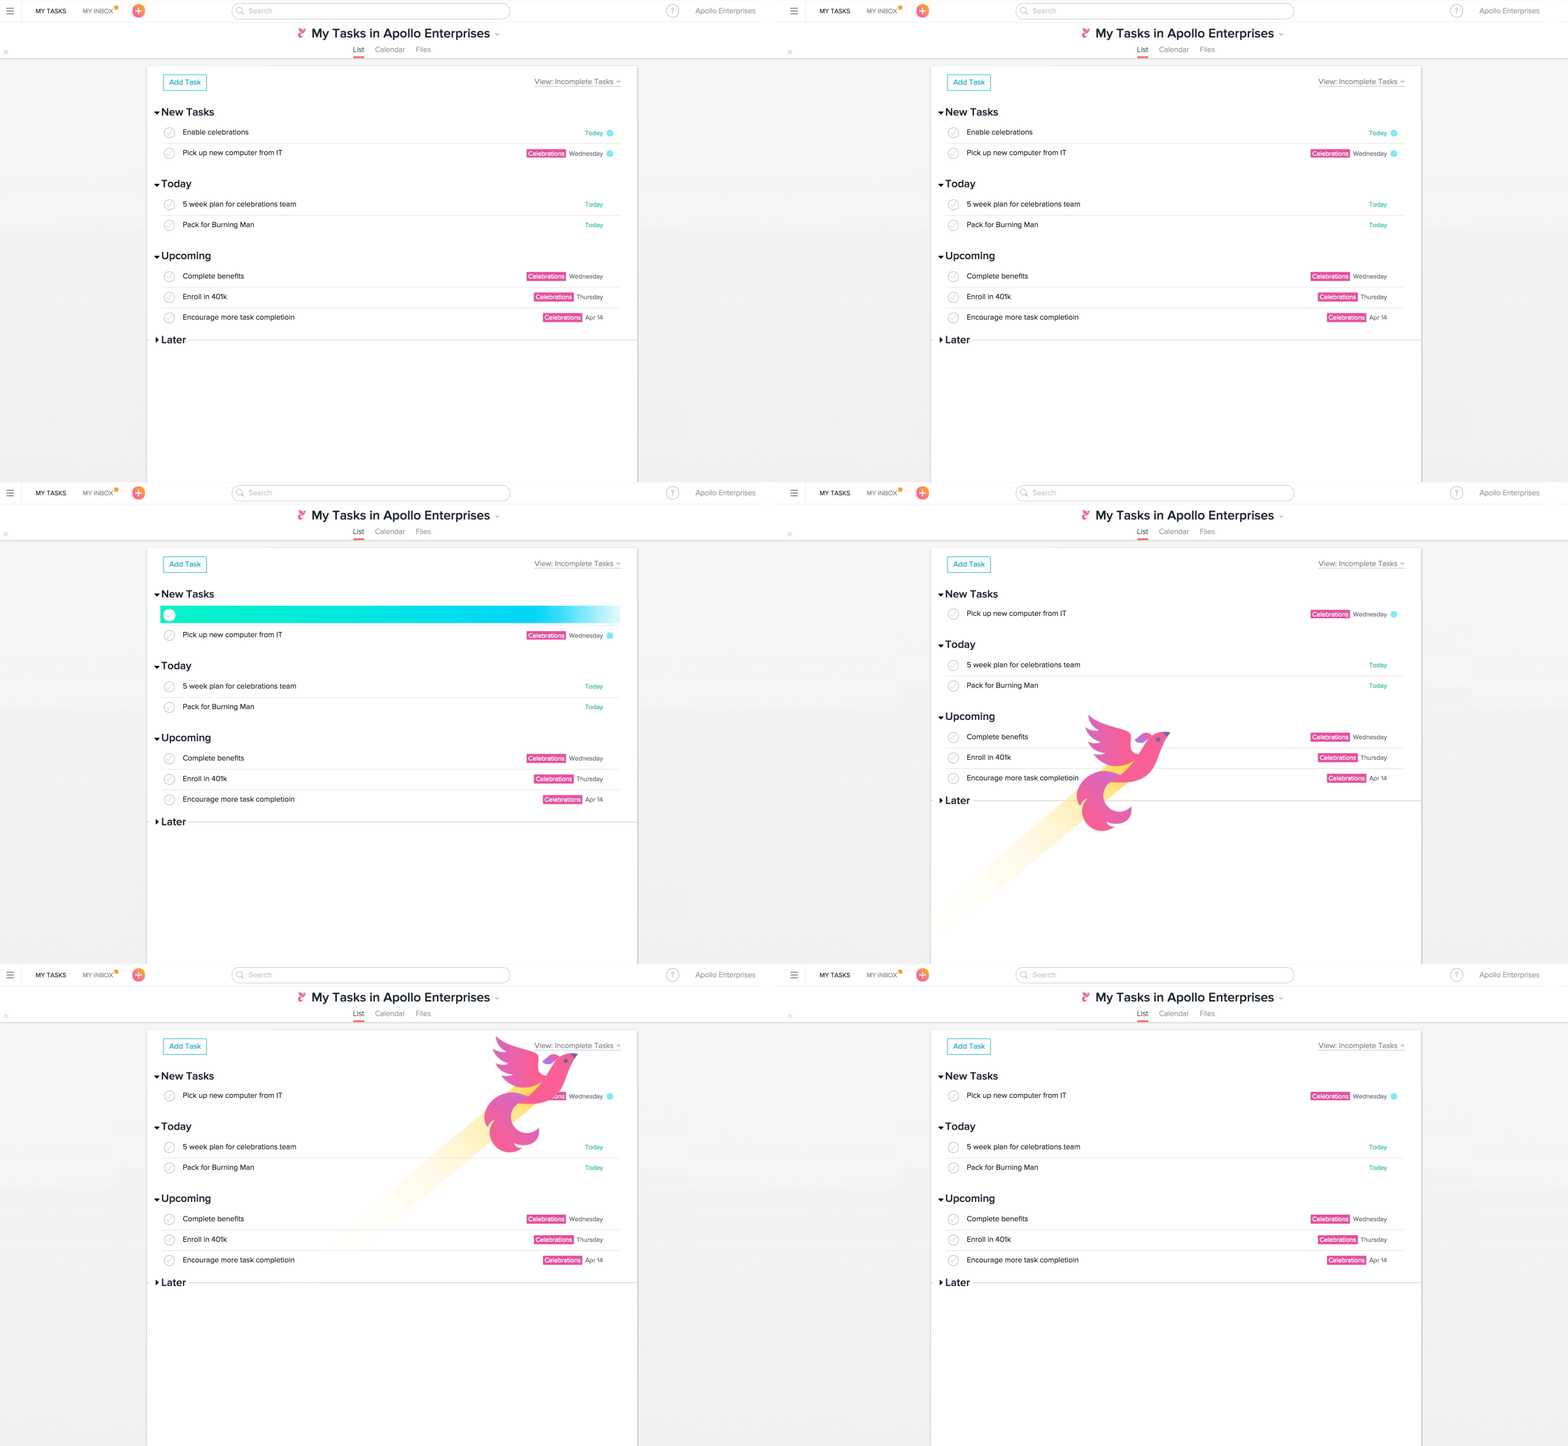
SEVEN. Asana- If you struggle to keep track of and stay on task for your day-to-day blog/biz (even life) functions, you should heavily consider using Asana. Asana is a project management tool in which you can keep all of your tasks organized and scheduled in an easy to use format. What I love the most about Asana is that I can create topic related calendars and can keep track of all of them with simple color coding (and I HUG color, friends!). Some of my Projects are named “Blog Editorial Calendar”, “Products + Services” and “Campaigns”. In each of these projects, I have various calendars for my tasks. For example, under Blog Editorial Calendar, I have subcategories called “Blog and Social Photos”, “Content” and “Social Media Scheduling”, so I am able to see everything that is due at one time in relation to my blog workflow. I’ve tested out a few different project management tools such as google calendars, Trello and BaseCamp, but none of them worked the way that I wanted them to. I wanted a system where I could view every task that was due in a calendar setting and I wanted each task to be color coded. Asana is the only program that worked this way. You can also move tasks around on your calendar that need a new due date simply by dragging from one date and dropping to another. Another fun thing about Asana is that when you mark a task as complete, sometimes a “celebration” appears which is an animation of a cute creature that moves across your screen leaving a colorful trail. This is a fun feature that may keep you motivated; sometimes we just need a small celebration for each win!
GIF Credit: https://blog.asana.com/2016/03/new-celebrations-meet-phoenix/
Lastly, if you collaborate with others on tasks or if you have a team, you can add people to your calendars to contribute and edit as well, so this is a true project management tool!
EIGHT. Google Docs w/headset- I’m all about saving time where necessary and utilizing my downtime when I can. One huge example of this is how many of my blog posts are composed...in my car while sitting in traffic using voice dictation into a google document and using my headset. Friends, this is a hidden gem! As commuters, some of us have short commutes and some have long ones. For those that have long ones, consider working on your blog posts en route. The ride will go by much faster and you will be able to mark that task as completed early on in the day!
If you are interested in a free cheat sheet of voice commands, click here to sign up for my free blogging + business resource library which contains various guides, worksheets, checklists and more for blog/biz productivity!
NINE. MailChimp- As a blogger, especially if you’re a one (Wo)man show, you need to be using automated systems to free up your time to work on more pressing tasks. MailChimp is my email service provider, so I am able to communicate with my entire list of members on things that are relevant and helpful to them by sharing useful tidbits of info periodically. BUT one of the best things is that MailChimp can send a custom designed email of new blog posts to subscribers rather than them having to rely on remembering my blog url! The great thing about this is exactly what I just mentioned...CUSTOM! Standard RSS feeds are so boring, but with MailChimp you can create a template to use for all of your blog post emails. Setting up this automated system is sure to save you mucho time because you will only have to design the template once, then you just set the rest of the details up and forget. It’s a well oiled machine!
TEN. Buffer- Social media is a pretty big deal when it comes to engagement and spreading the word about your blog/biz. It can be difficult to keep up with every single task that is essential when creating a blog post. These days, creating a post isn’t cut and dry; it involves taking and editing photos to include with the post, writing and editing the content, creating special graphics to promote the post AND social media promotion. By the way, no, social promotion doesn’t mean to only auto-tweet your post one time after it publishes...it means that you need to promote that sucker multiple times in various ways on multiple social platforms. This is where Buffer, the social media automation system, steps in. You can schedule content to post to various social media accounts which will in turn free up more of your time to be working on more pressing blog/biz tasks! This, my friends, is the secret sauce to productivity! Automation is my BEST friend, and it’s really your assistant when you’re just starting out and can’t afford to have a team or virtual assistant yet. The free version of Buffer allows up to 10 tweets in your queue at a time which is great for just starting out. To fully take advantage of this, it is a good idea to pre-plan your social copy. For example, I plan out 10 tweets a day for 5 days worth of content (50 tweets total), then add 10 a day to my buffer queue. I keep track of my tweets in a Google Sheet so that I can access it anywhere at any time.
Pro tip: When planning out your social copy, you will probably be promoting the same posts multiple times (especially on twitter). To do this without sounding like a robot, you just need to get creative and think of various ways to say the same thing! For example, if you want to tweet about a post, “5 Ways to Style Your Bathroom Counters Without the Clutter”, you can tweet “Clutter isn’t cute, so don’t let it rule your bathroom counters. Click through for 5 tips to avoid this.” and “Use non-transparent storage containers to wrangle bathroom counter items in a stylish way. Four more tips on the blog”.
Lauren thank you so much for sharing your awesome blogging resources with everyone! I love the digital resources Lauren mentioned and find them all so helpful in keeping me stay on track and streamlining my blog process. If your in need of some creative and fun blogging & business tips, make sure you visit Lauren's blog!


